Nightscout for Cloudflare: First-Time Deployment and Setup
Follow the steps below to deploy your own Nightscout on Cloudflare for free. It usually takes just a few minutes, and you do not need any technical experience.
Before you start
You will need:
- A Cloudflare account
- A GitHub account
Step 1: Start the deployment
Open the Nightscout for Cloudflare project page and click the orange Deploy to Cloudflare button.
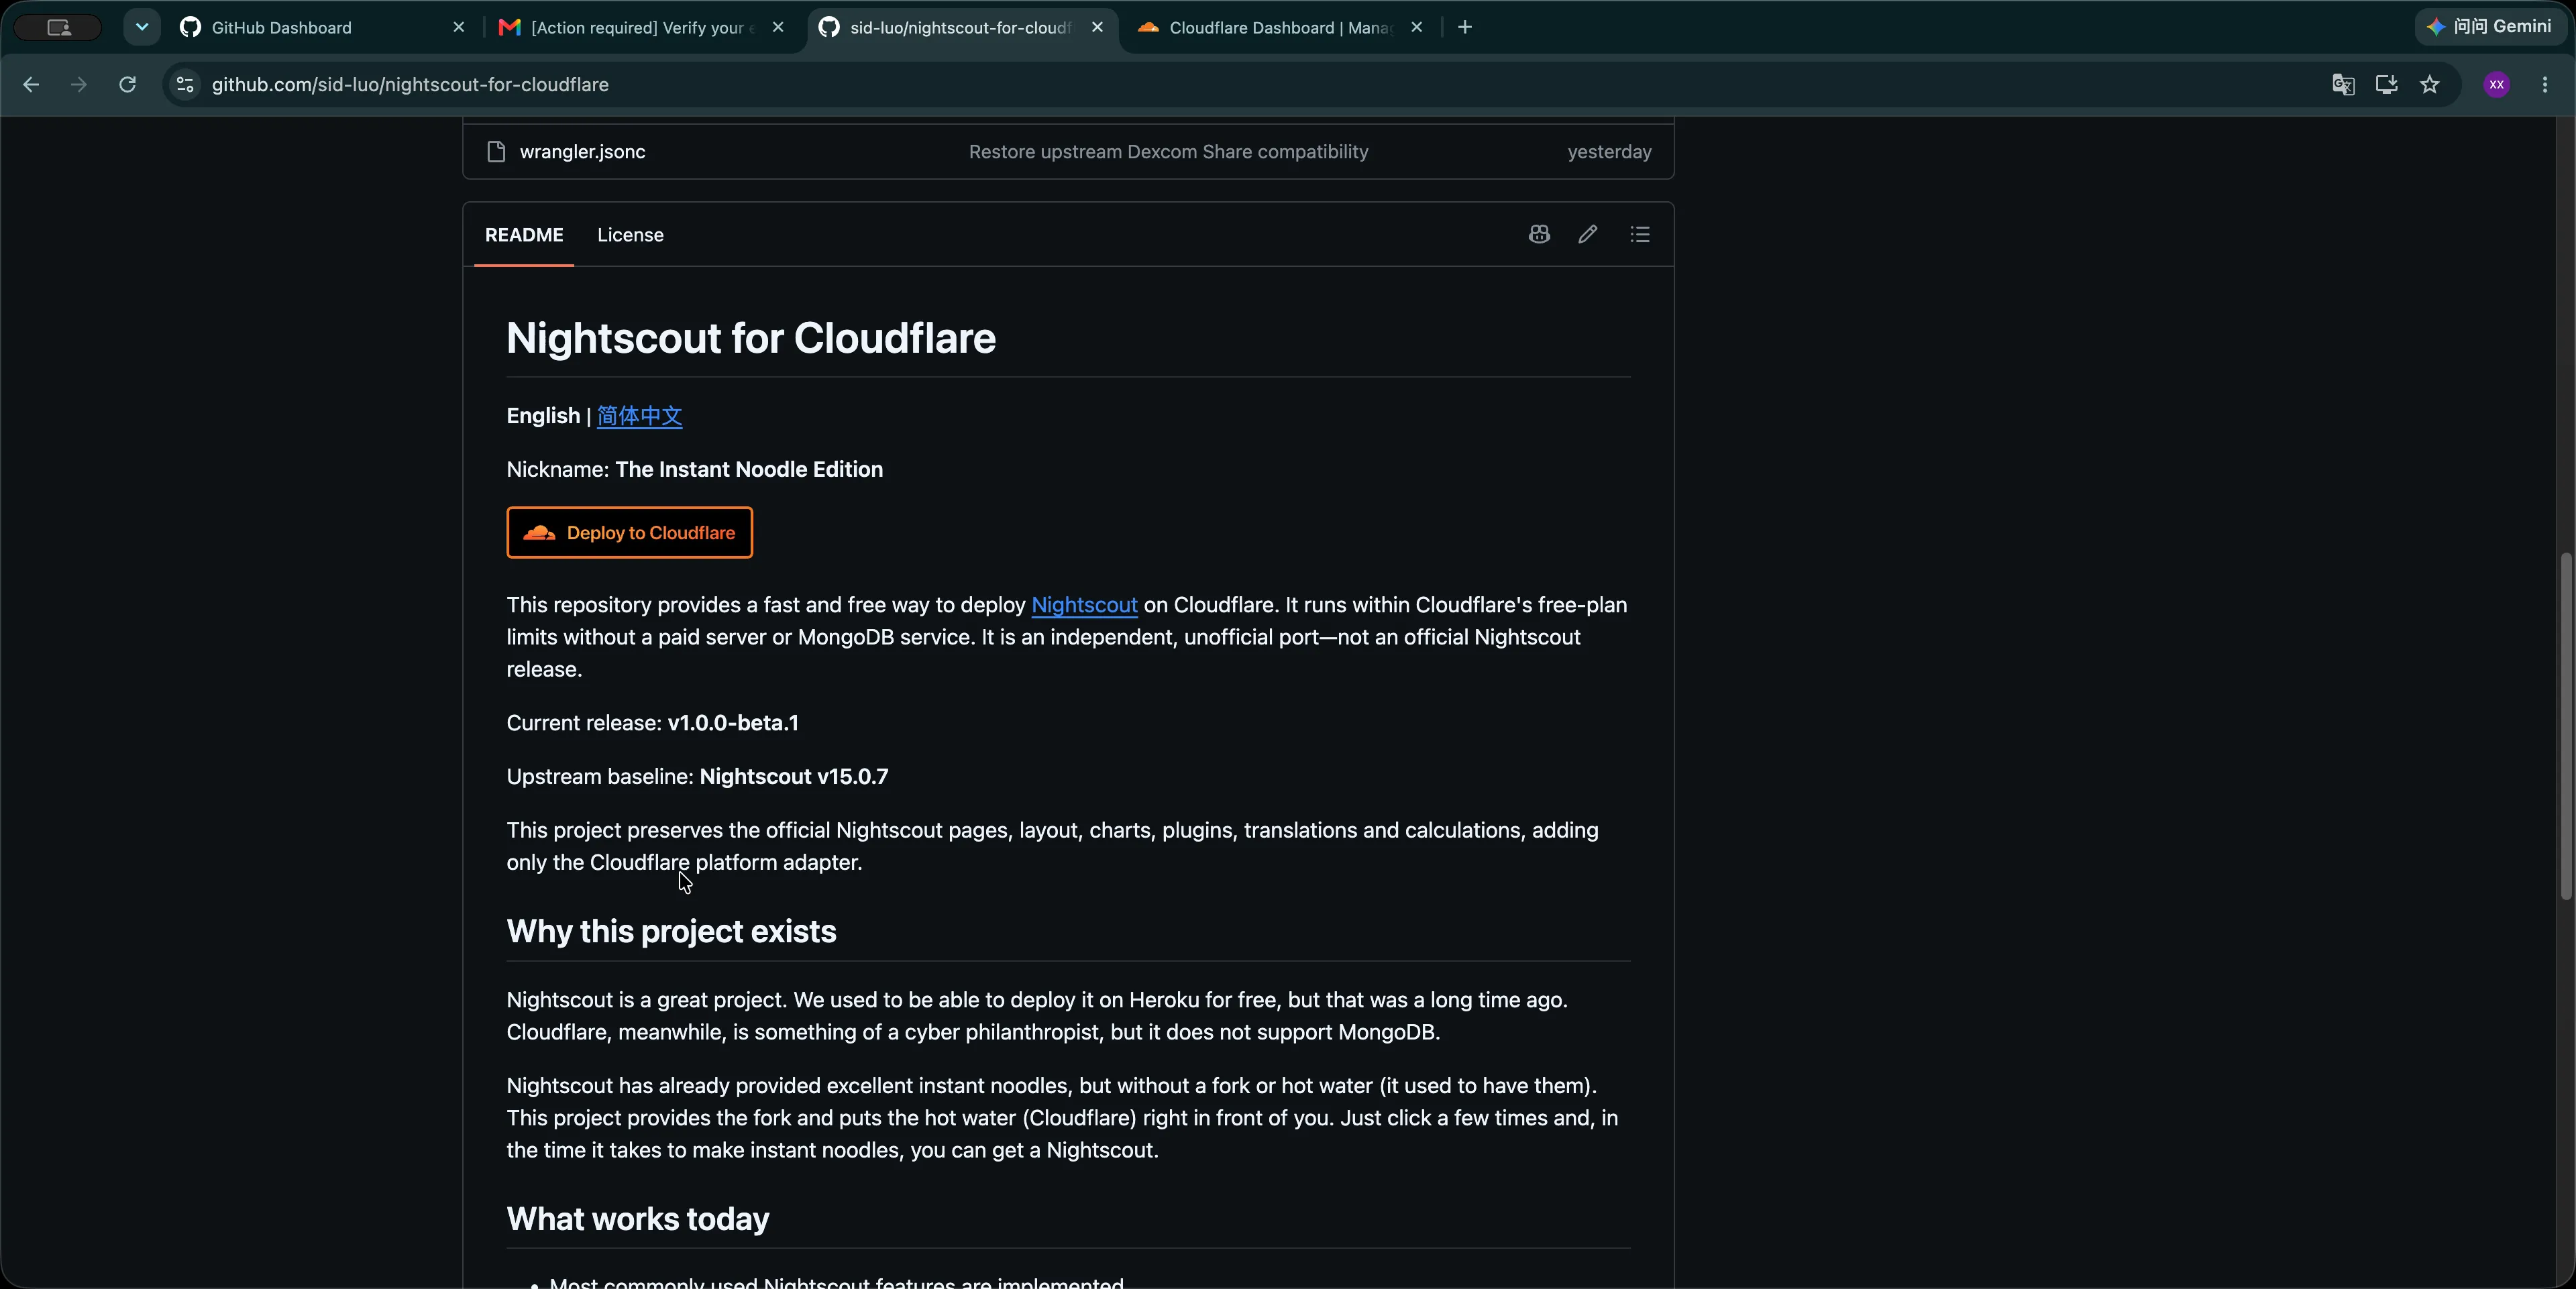
Your browser will take you to the Cloudflare deployment page.
Step 2: Connect your GitHub account
On the Cloudflare deployment page, find Git account and click New GitHub connection.
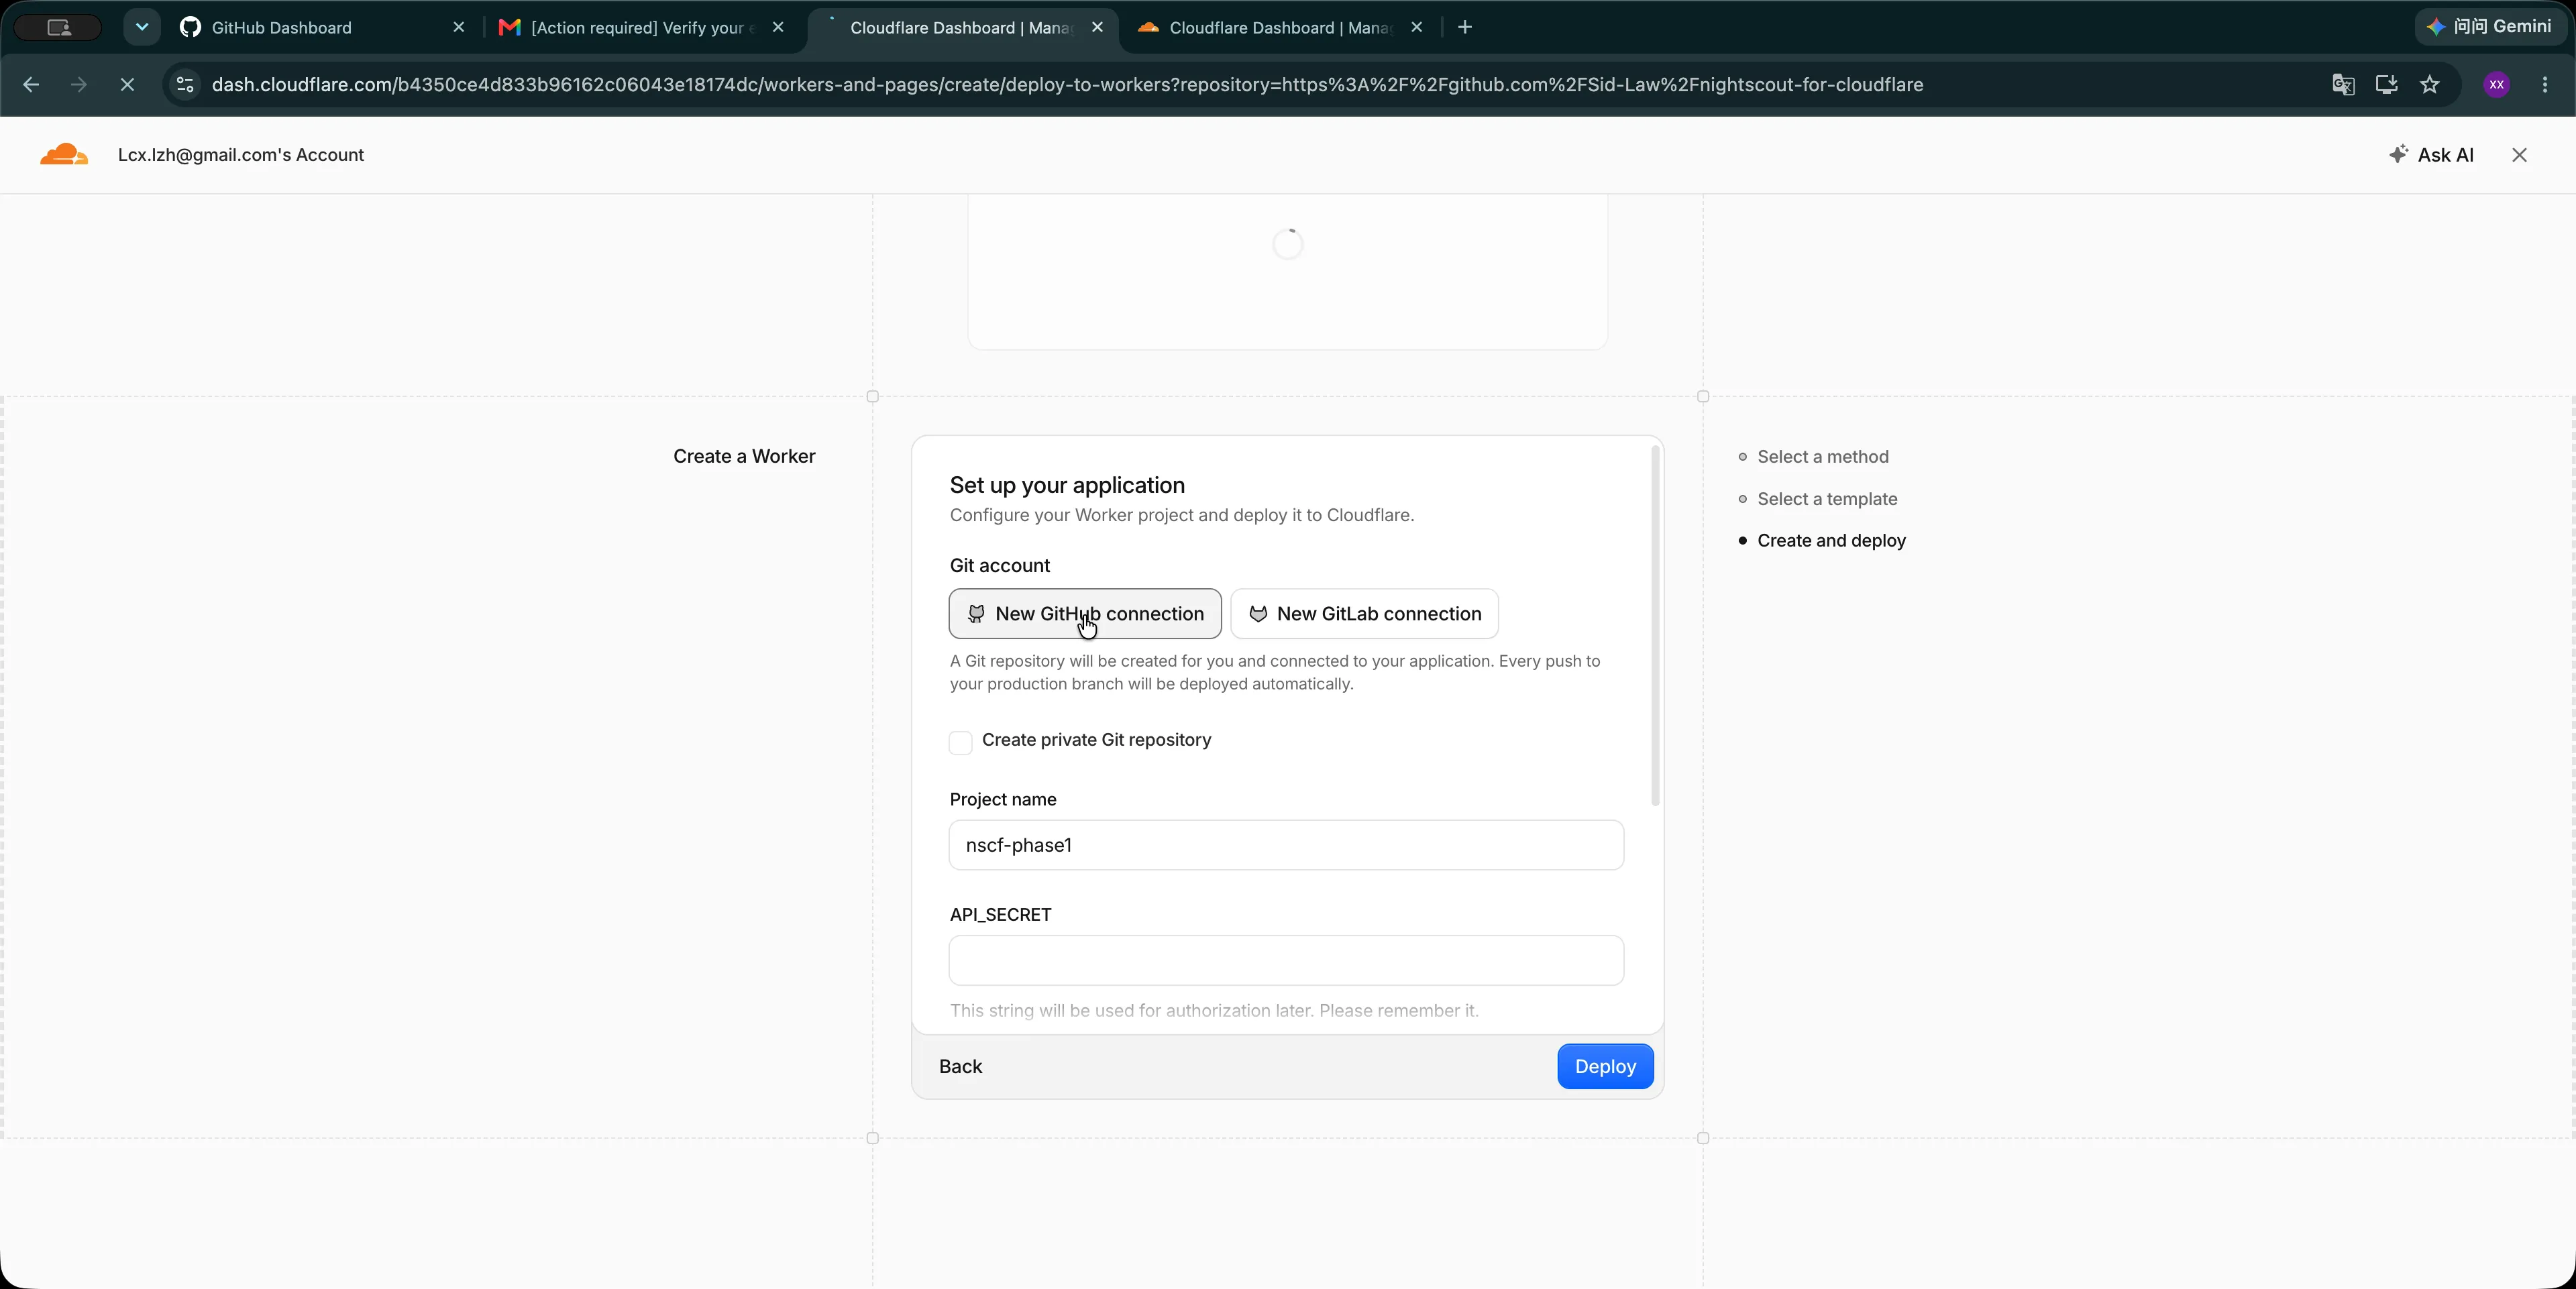
You will be sent to GitHub to sign in and authorize Cloudflare.
If you have connected GitHub before, your account may already appear here. In that case, you do not need to authorize it again.
Step 3: Authorize Cloudflare on GitHub
On the GitHub authorization page, select All repositories, then click the green Install & Authorize button.
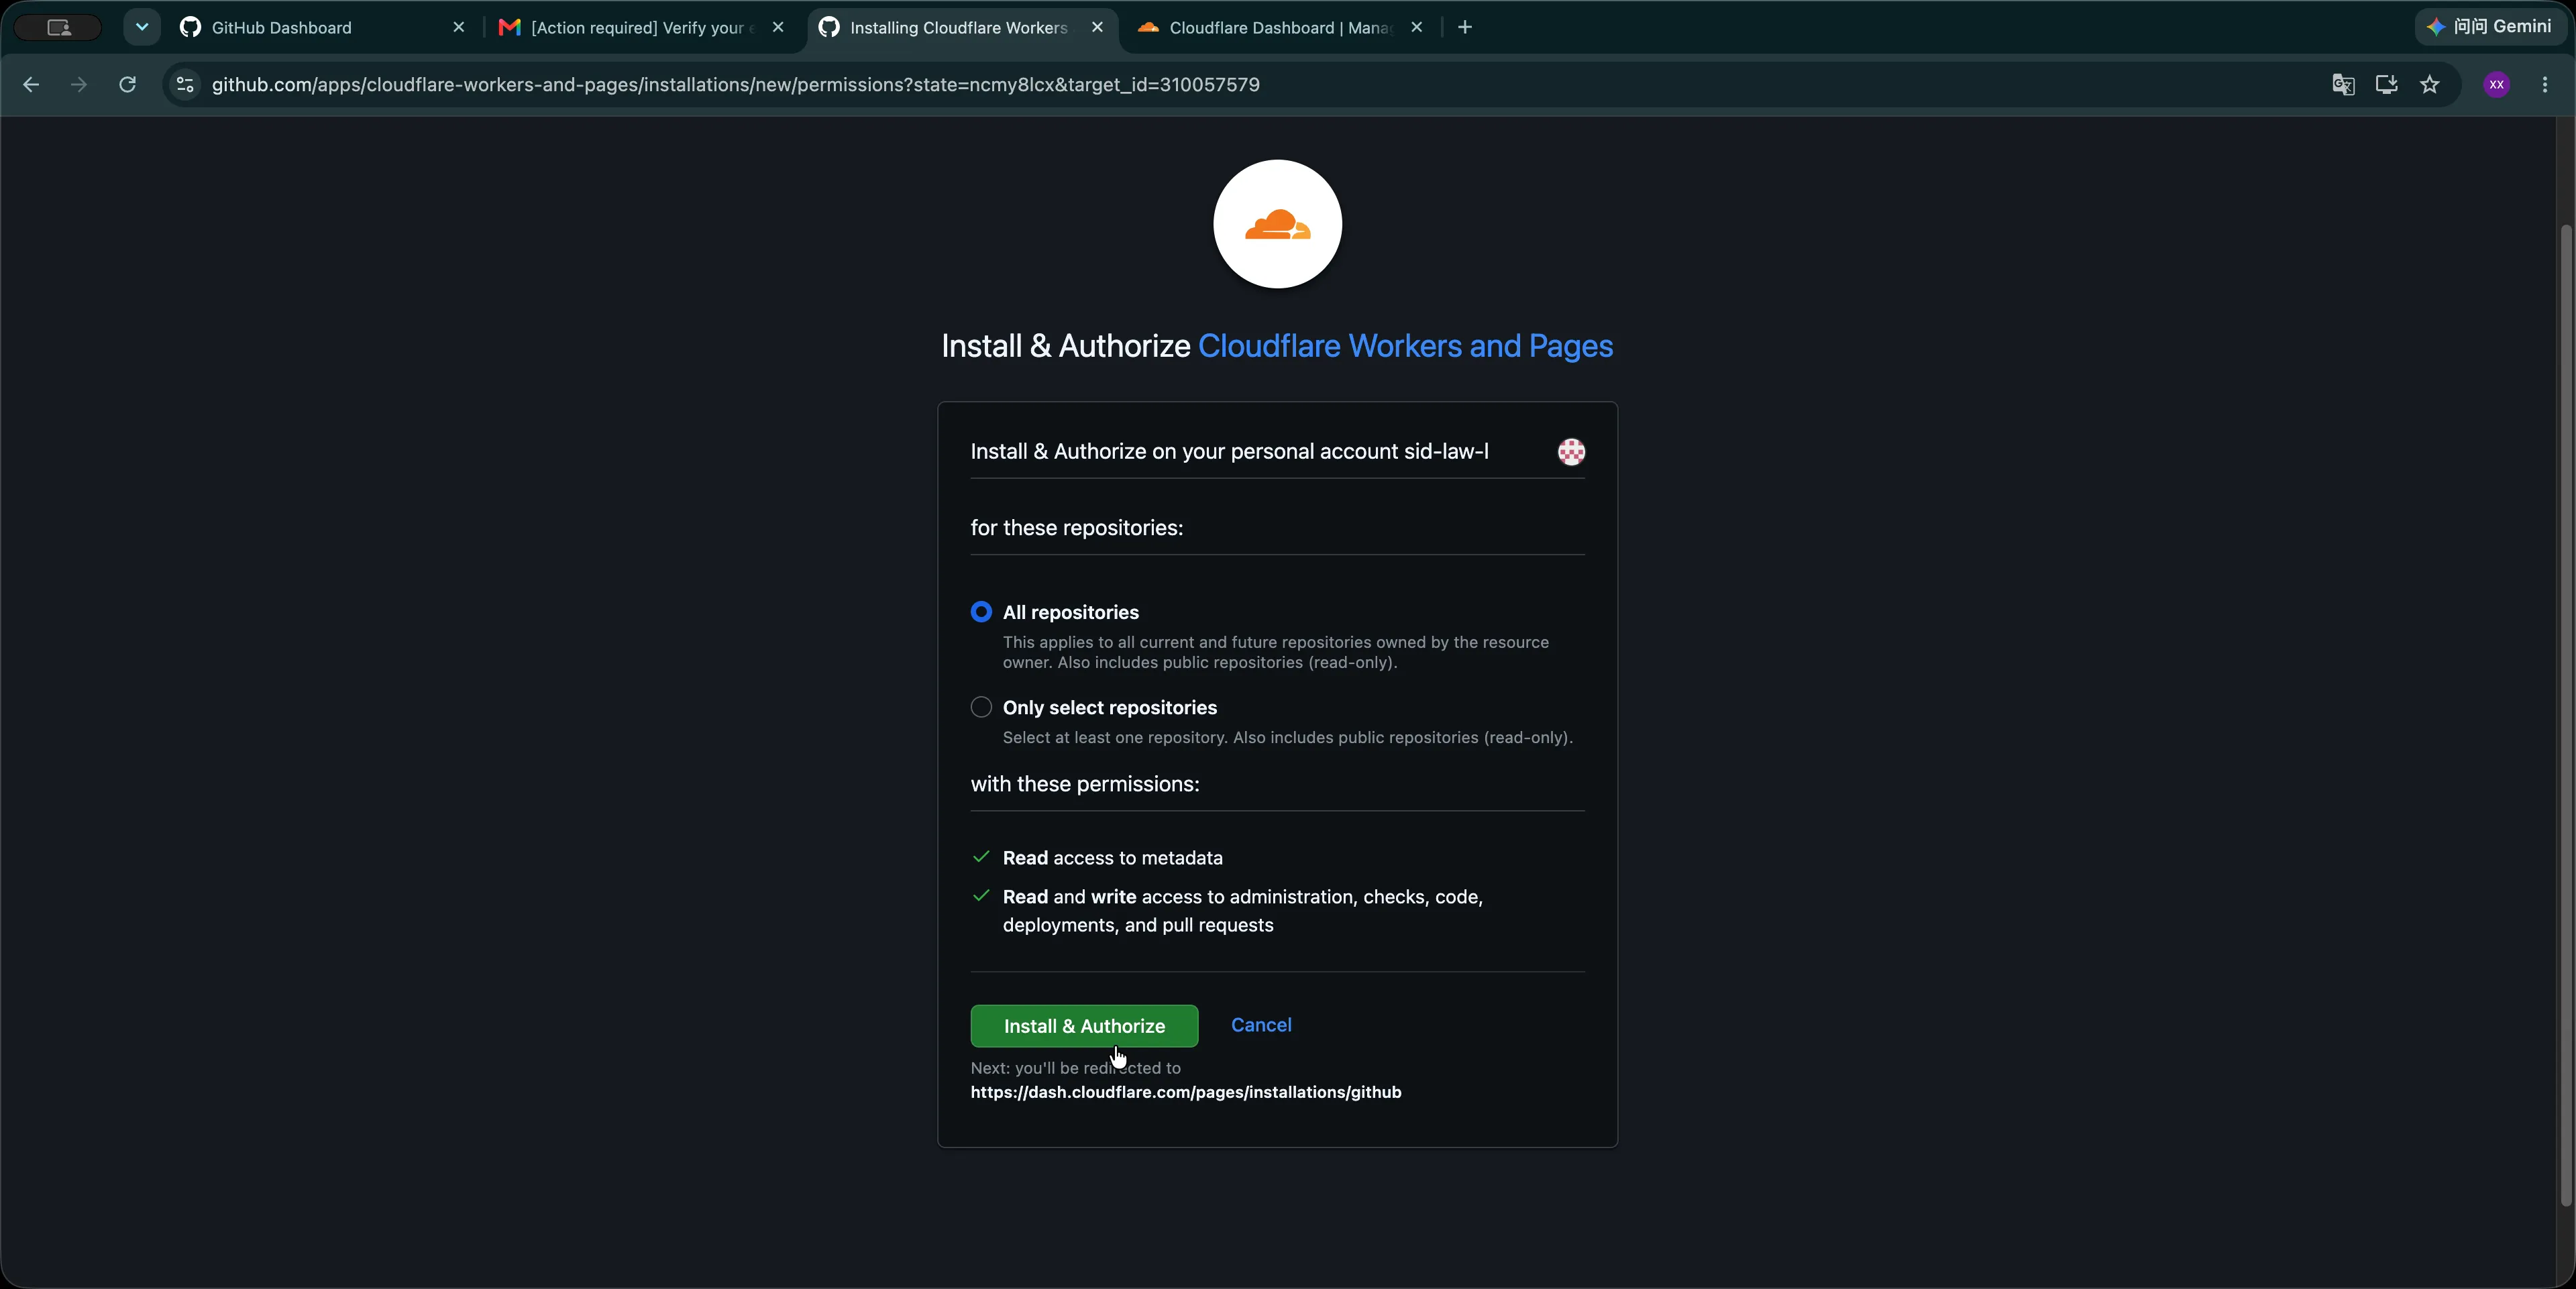
Once authorization is complete, GitHub will send you back to Cloudflare automatically.
Cloudflare needs access to all repositories here because it is about to create a new deployment repository in your GitHub account.
Step 4: Enter the deployment details
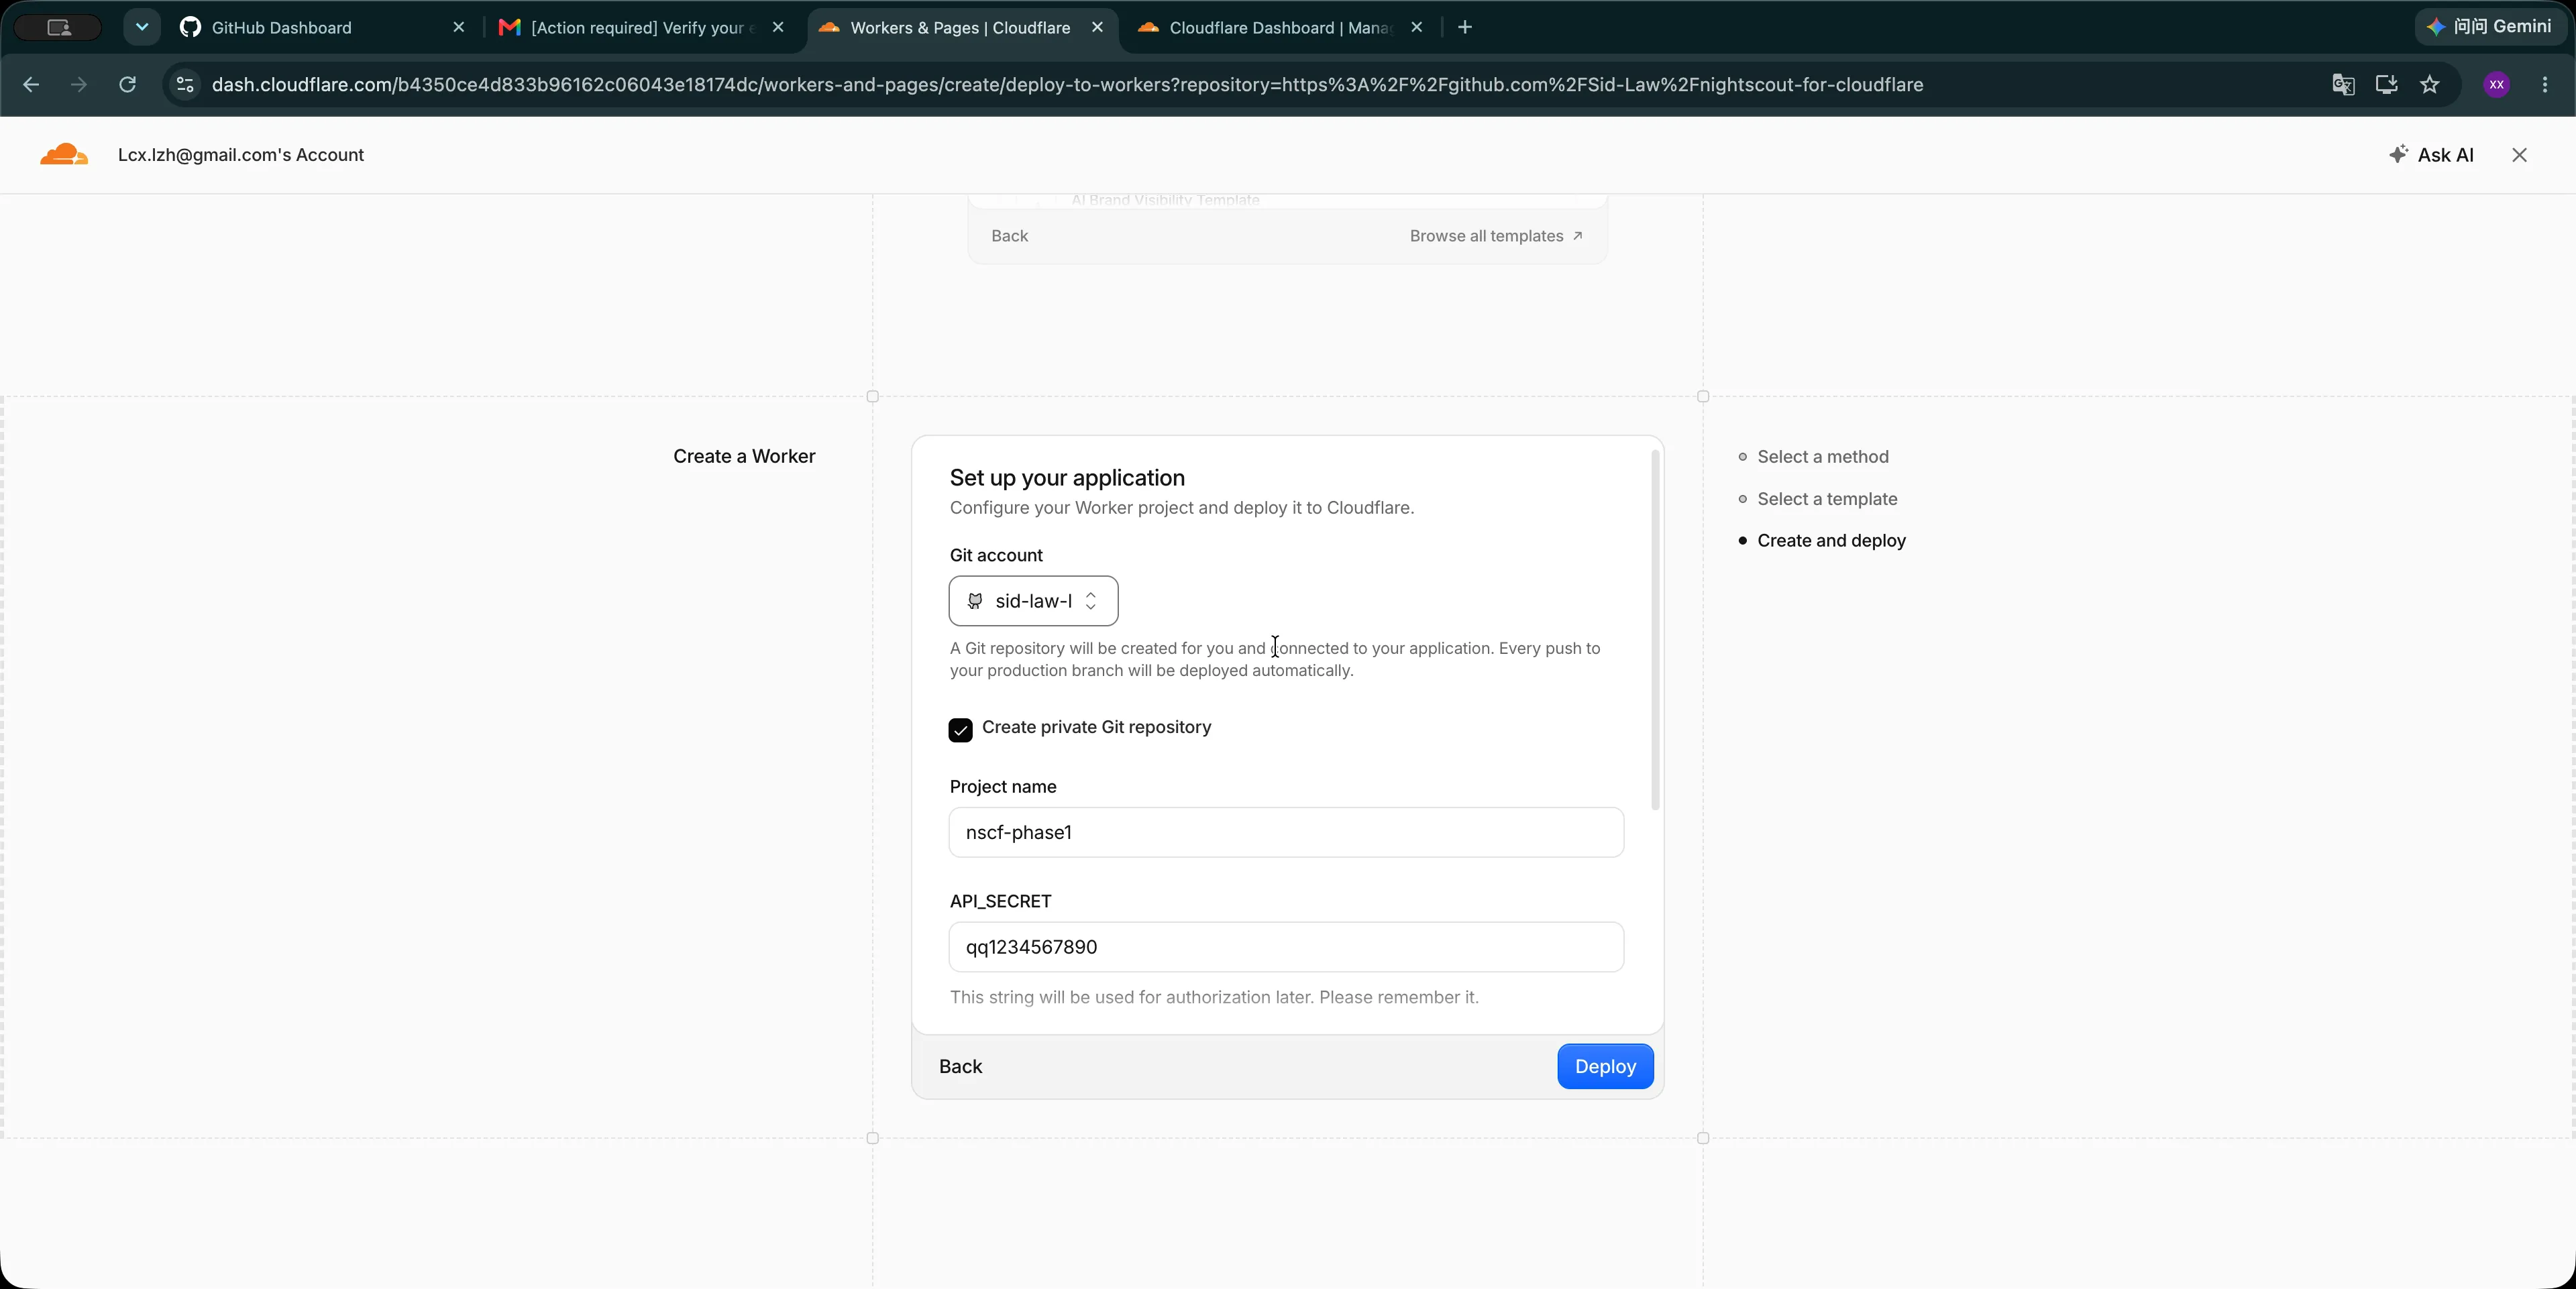
Back on Cloudflare, fill in the deployment details:
- Under Git account, select the GitHub account you just connected.
- Check Create private Git repository.
- Enter a name under Project name.
- Enter a password under API_SECRET.
API_SECRET must be at least 12 characters long. Make sure you remember it.
Git repository
When Create private Git repository is checked, Cloudflare will create a private repository in your GitHub account.
Project name
You can keep the name Cloudflare gives you, or change it to something easier to recognize.
This name will also become part of your default Nightscout address.
API_SECRET
API_SECRET is the password Nightscout uses to verify you when you open its settings or admin pages.
Choose your own password and keep it somewhere safe.
And do not worry—if you forget it, it is easy to find and you can change it at any time. This guide shows you where later.
Step 5: Deploy
When everything is ready, click Deploy in the bottom-right corner.
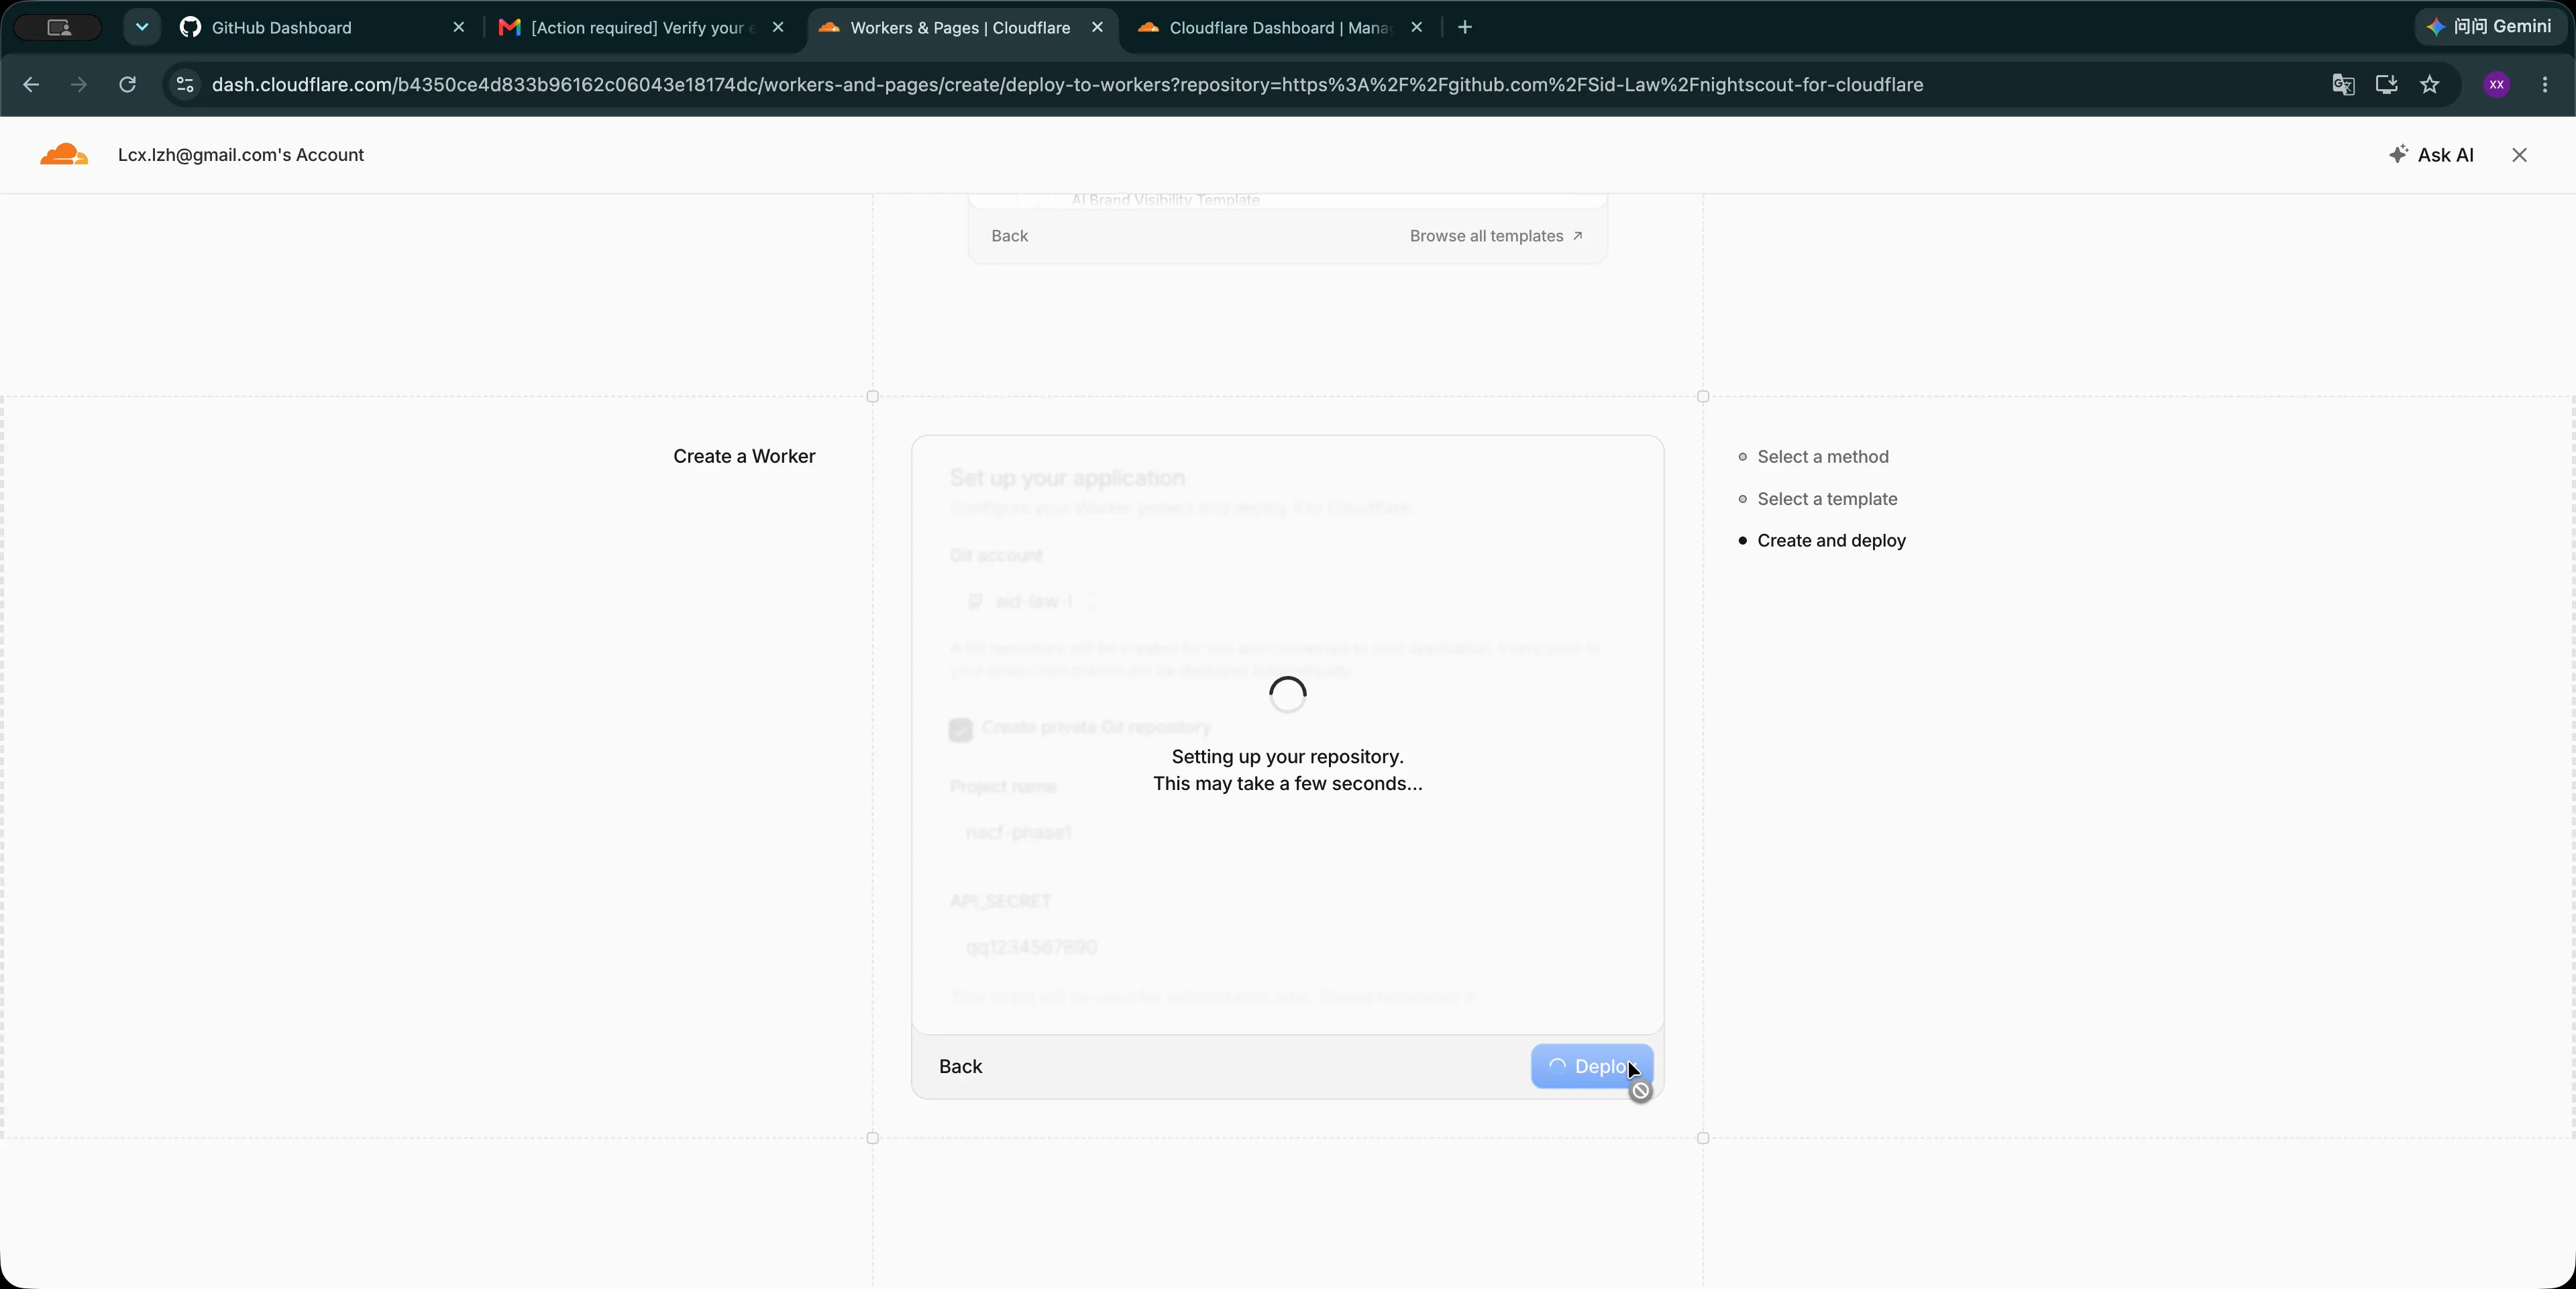
Cloudflare will now:
- Create a private GitHub repository
- Copy the Nightscout for Cloudflare source code
- Install the required packages
- Build the project
- Deploy the Worker
You do not need to do anything during this part. Keep the page open, wait, and do not click Deploy again.
Step 6: Wait for the build
When the build page opens, there is nothing else you need to do. Just let it finish.
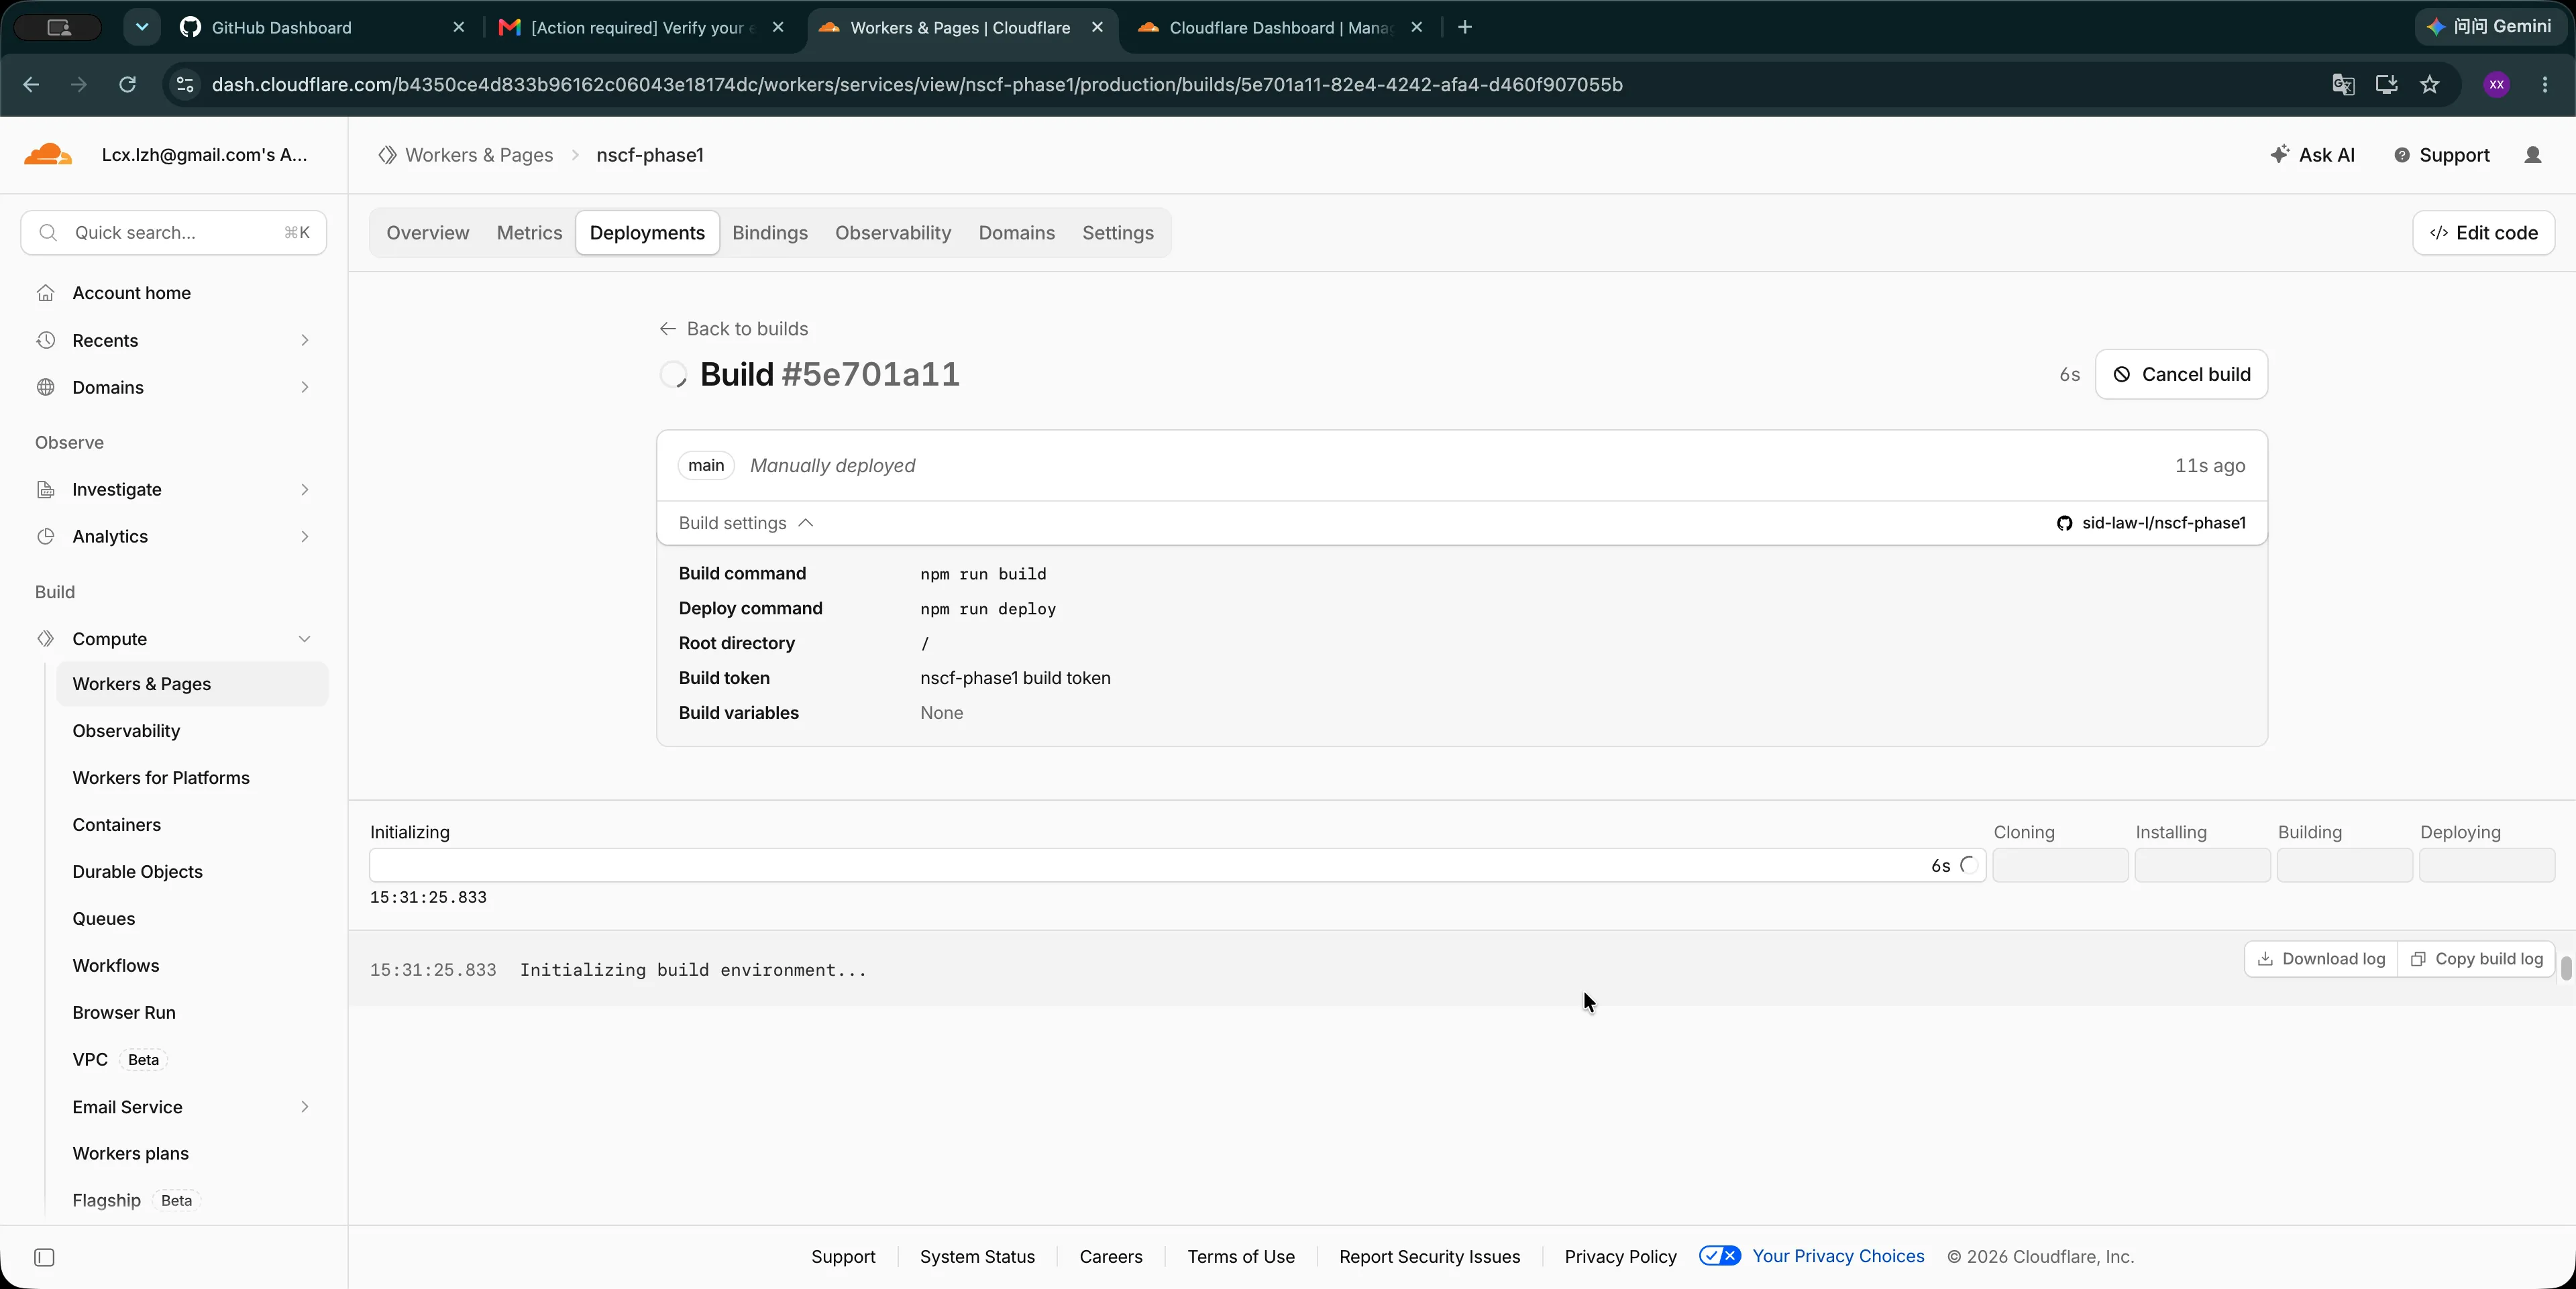
Cloudflare will work through these stages:
- Initializing: Preparing the build environment
- Cloning: Copying the source code
- Installing: Installing the required packages
- Building: Building the app
- Deploying: Putting the app online
Do not click Cancel build while it is running.
Step 7: Check that the deployment finished
The build usually takes about two minutes, although it can be a little faster or slower depending on the network and Cloudflare.
When every stage at the top has a green check mark and you see these two lines at the bottom of the log, the deployment is complete:
Success: Deploy command completed
Success! Build completed.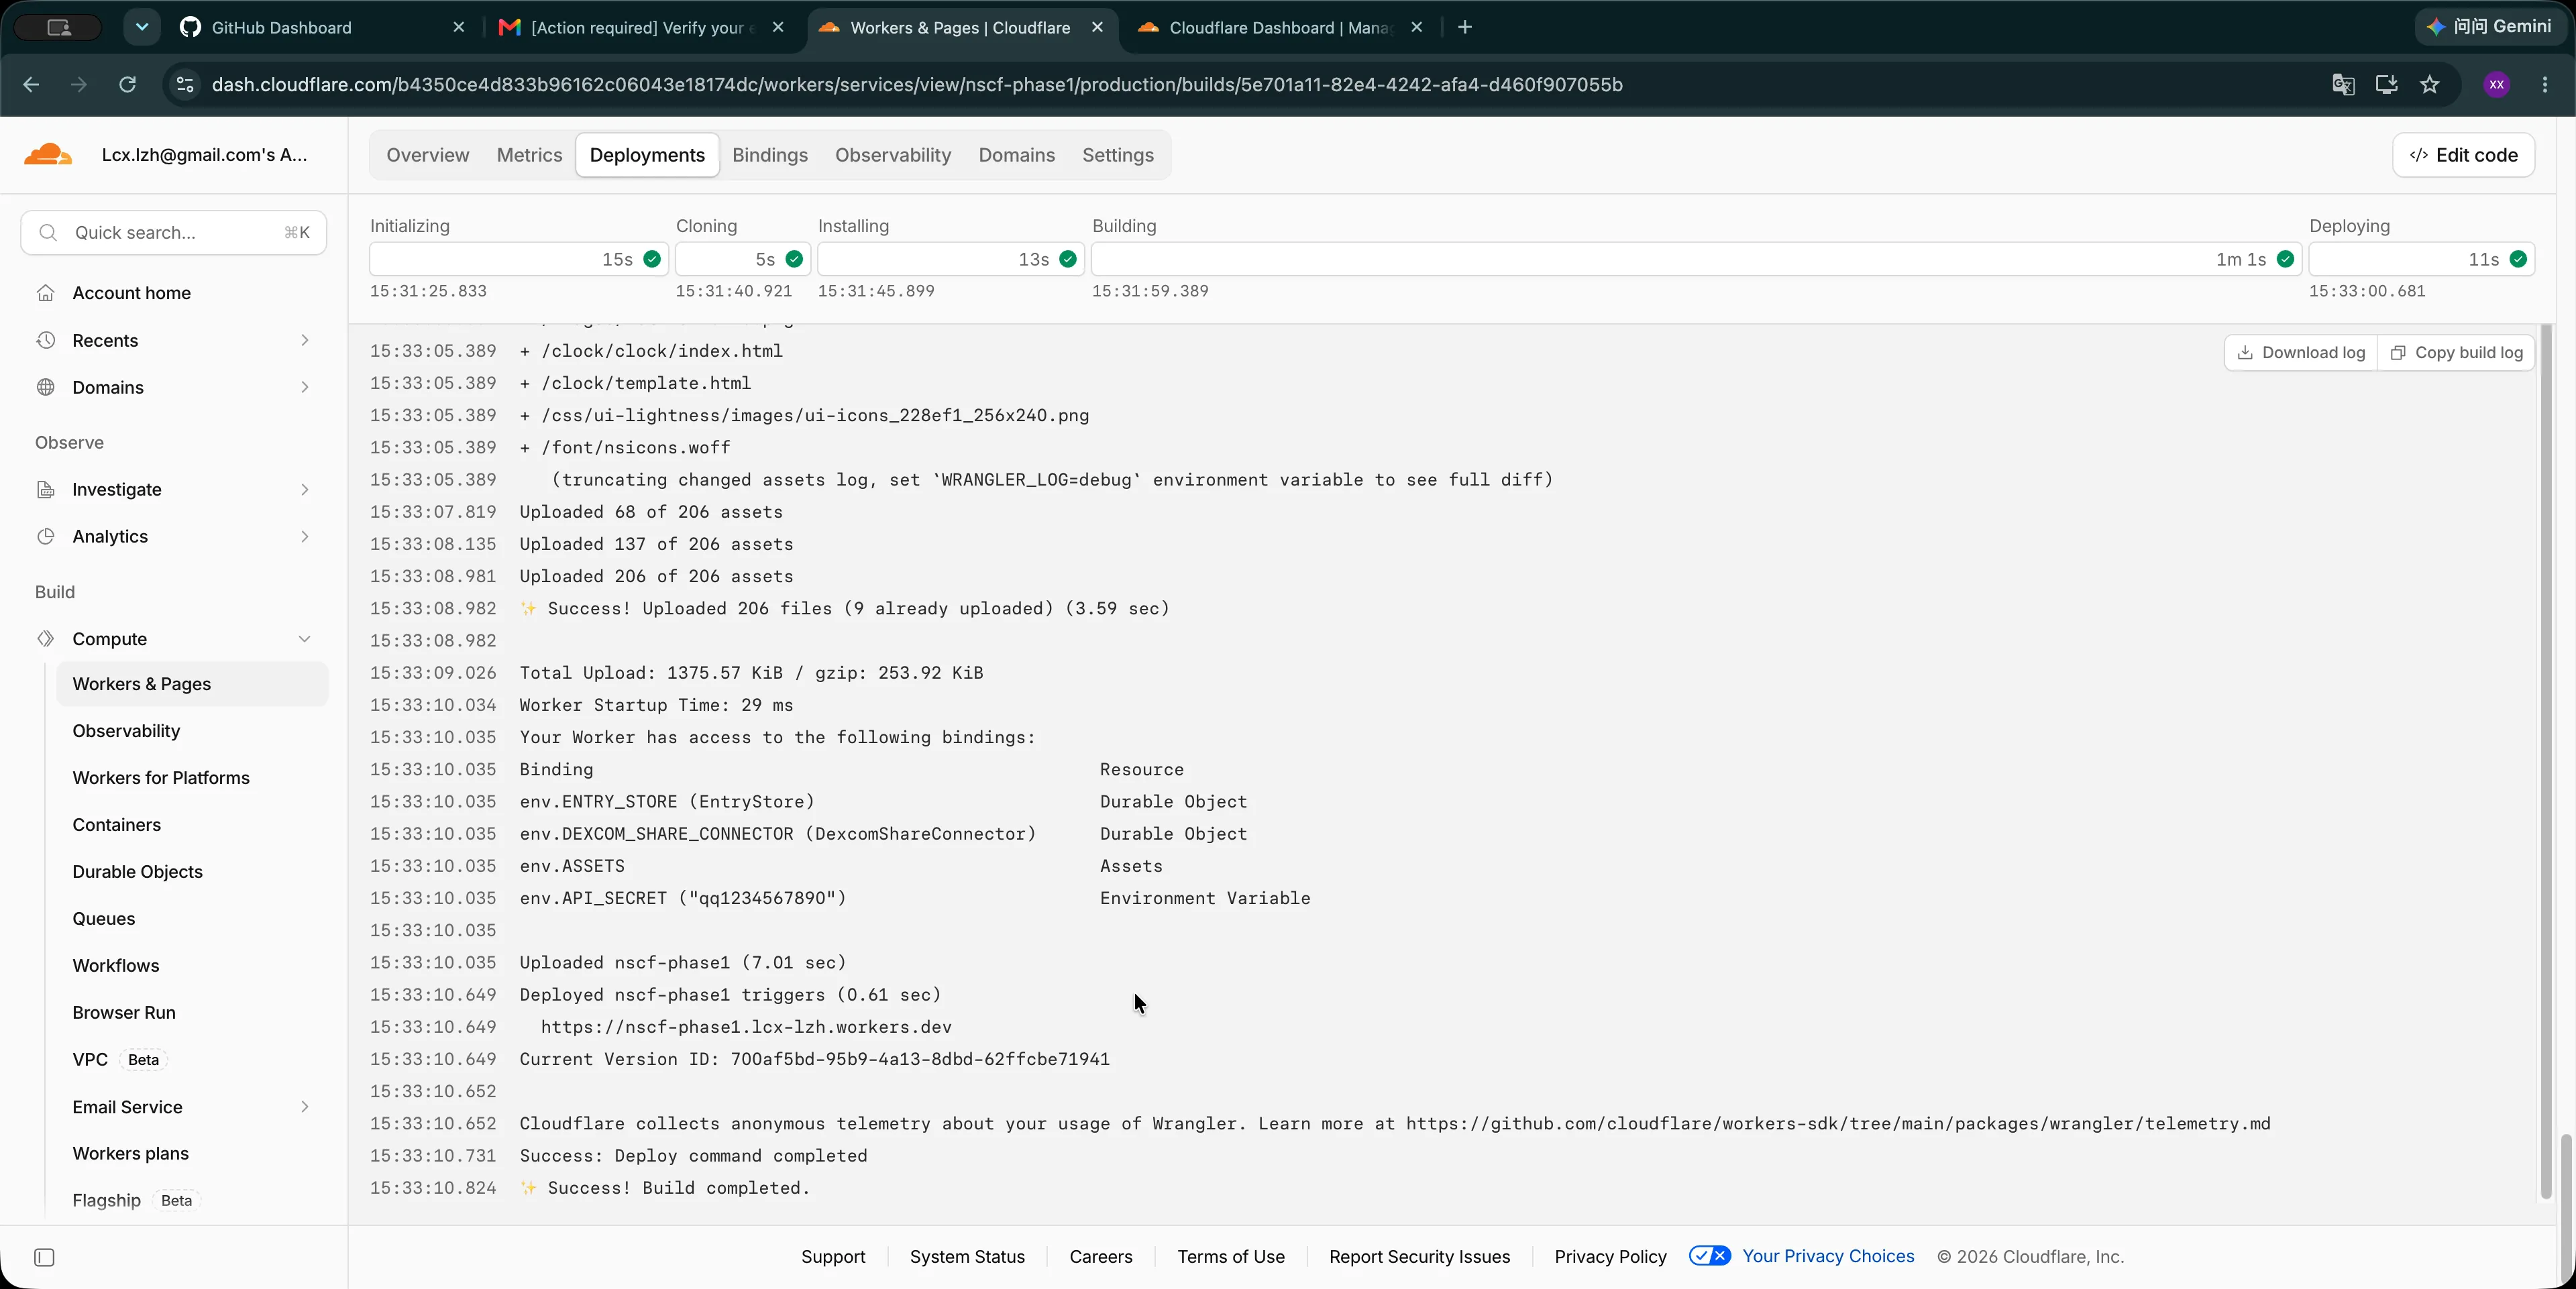
The log will also show an address ending in workers.dev, for example:
https://your-project.your-cloudflare-subdomain.workers.devThat is your Nightscout address.
Step 8: Find your Nightscout
Congratulations—your Nightscout is now online.
Click Workers & Pages in the menu on the left. The app you just deployed will appear on this page.
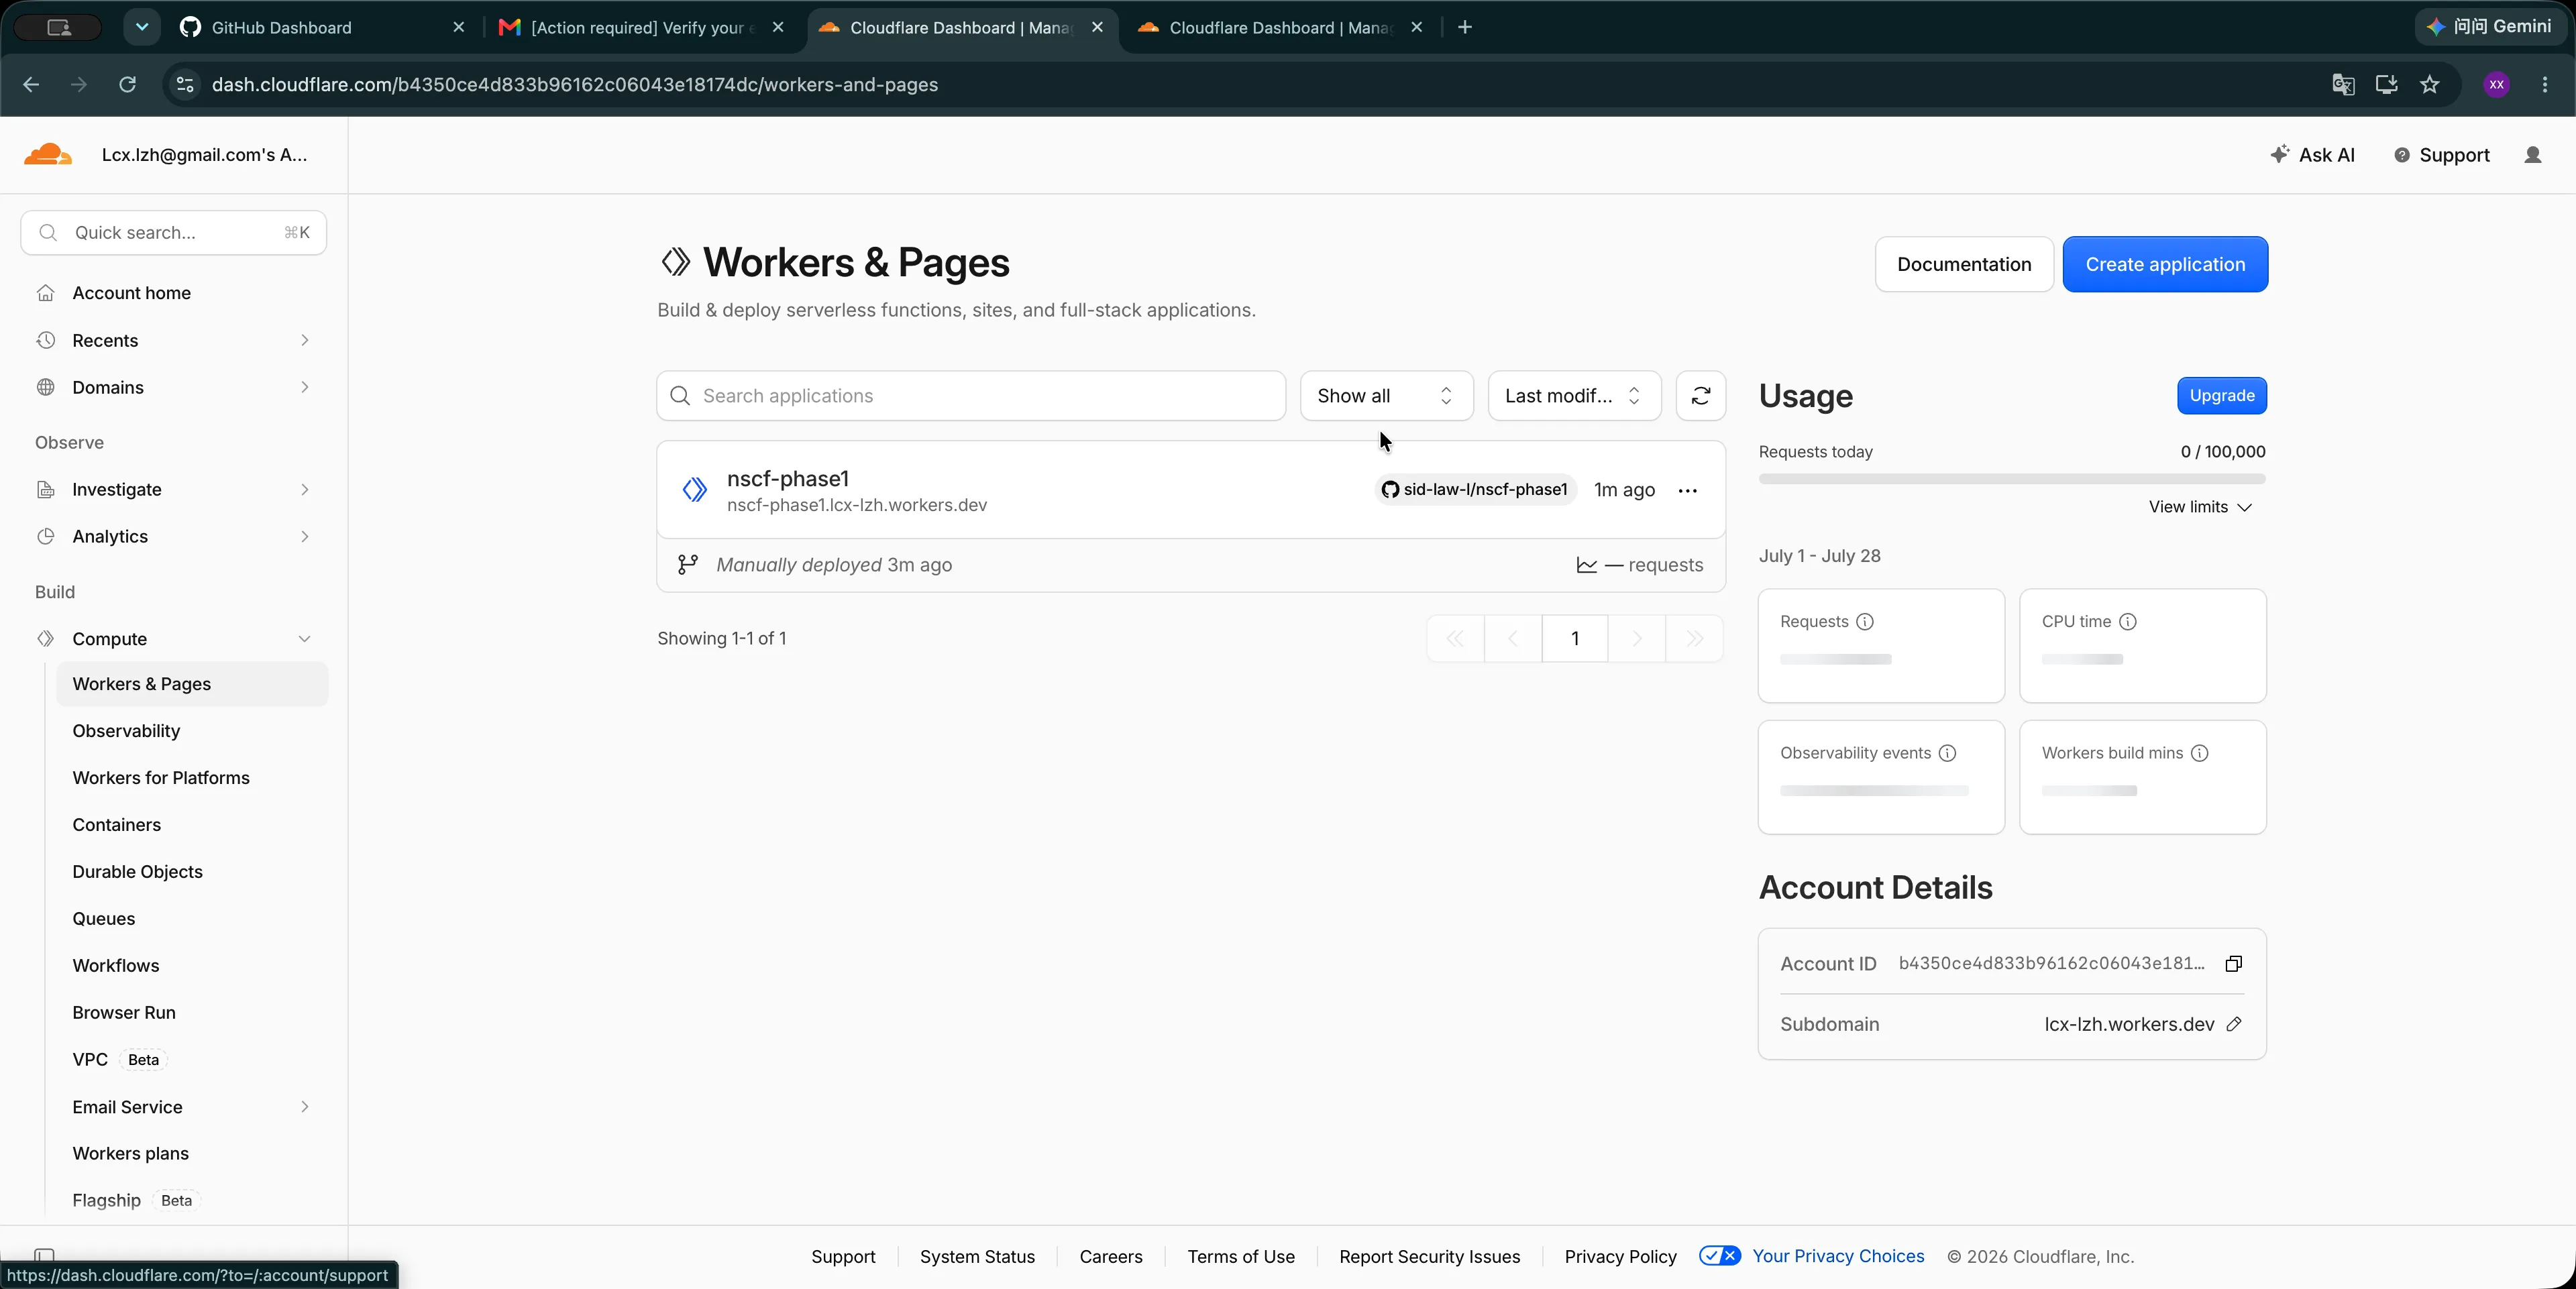
Your workers.dev address appears below the app name. Click it to open Nightscout.
If the new app does not appear right away, wait a few seconds and refresh the page.
Step 9: Variables and advanced settings (optional)
Open your Worker, then go to:
Settings → Variables and secrets
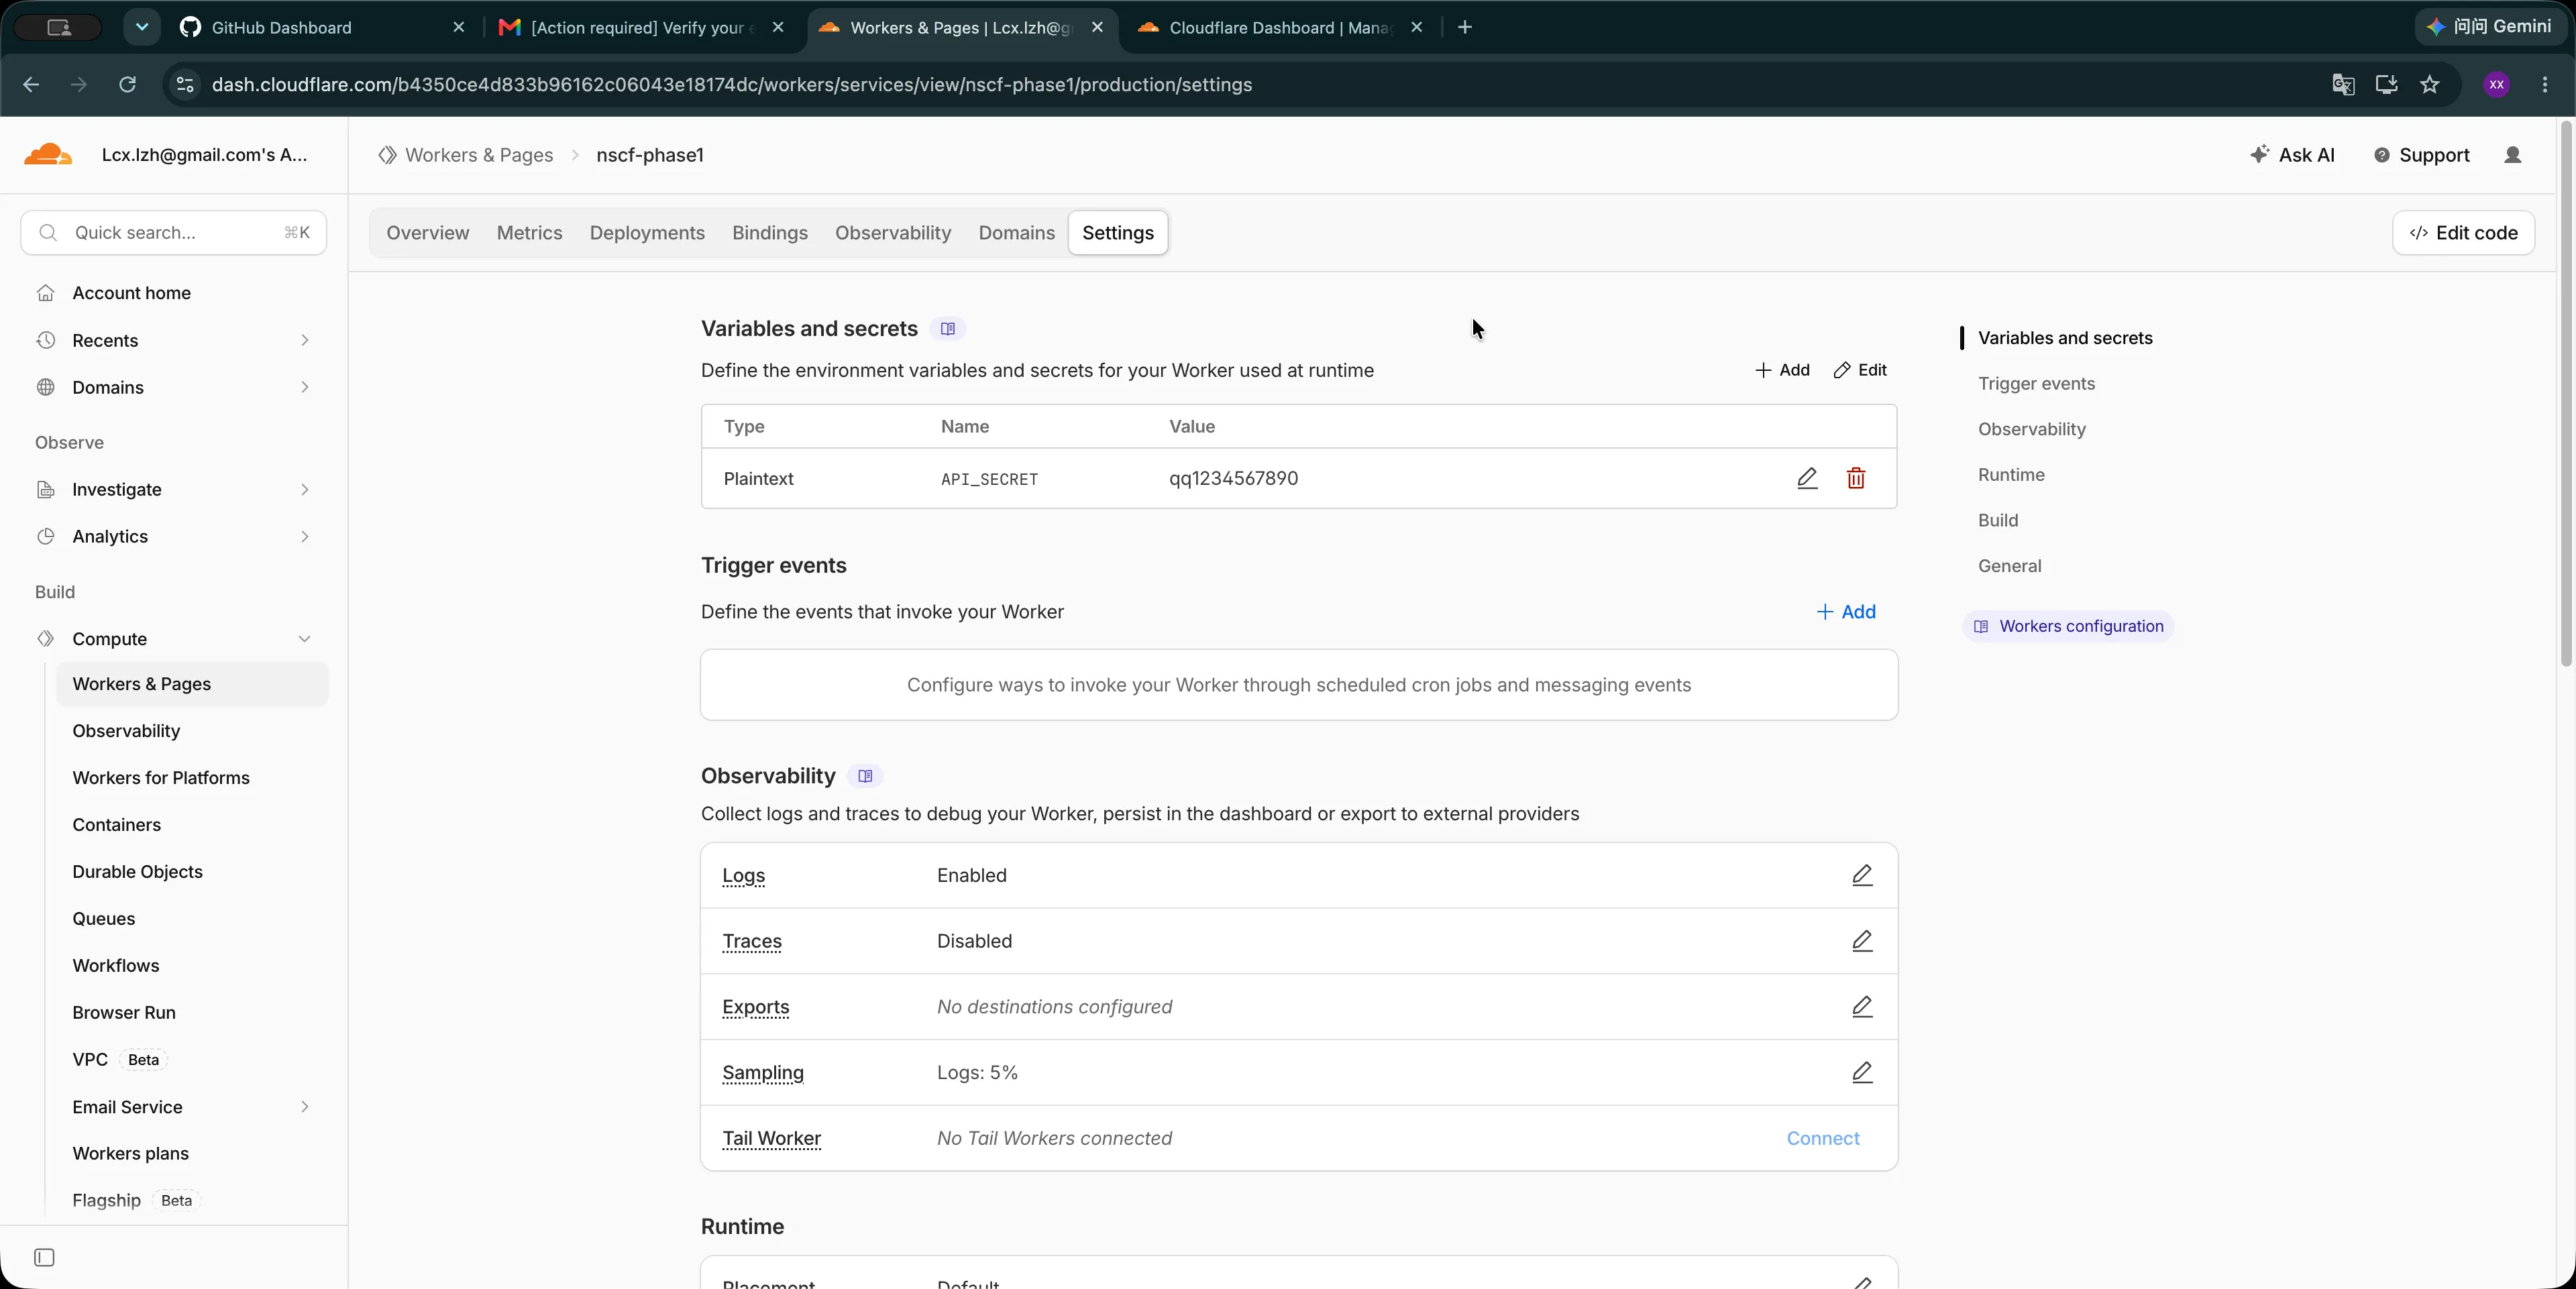
From here, you can:
- Change your current
API_SECRET - Add environment variables for more Nightscout features
- Manage other runtime settings
If you change API_SECRET, use the new password the next time you sign in to Nightscout.
If all you need is a place to view your glucose data, and you do not need a custom domain or extra Nightscout features, you are already done.
Step 10: Finish the first-time setup
The first time you open Nightscout, it will take you to the Profile Editor.
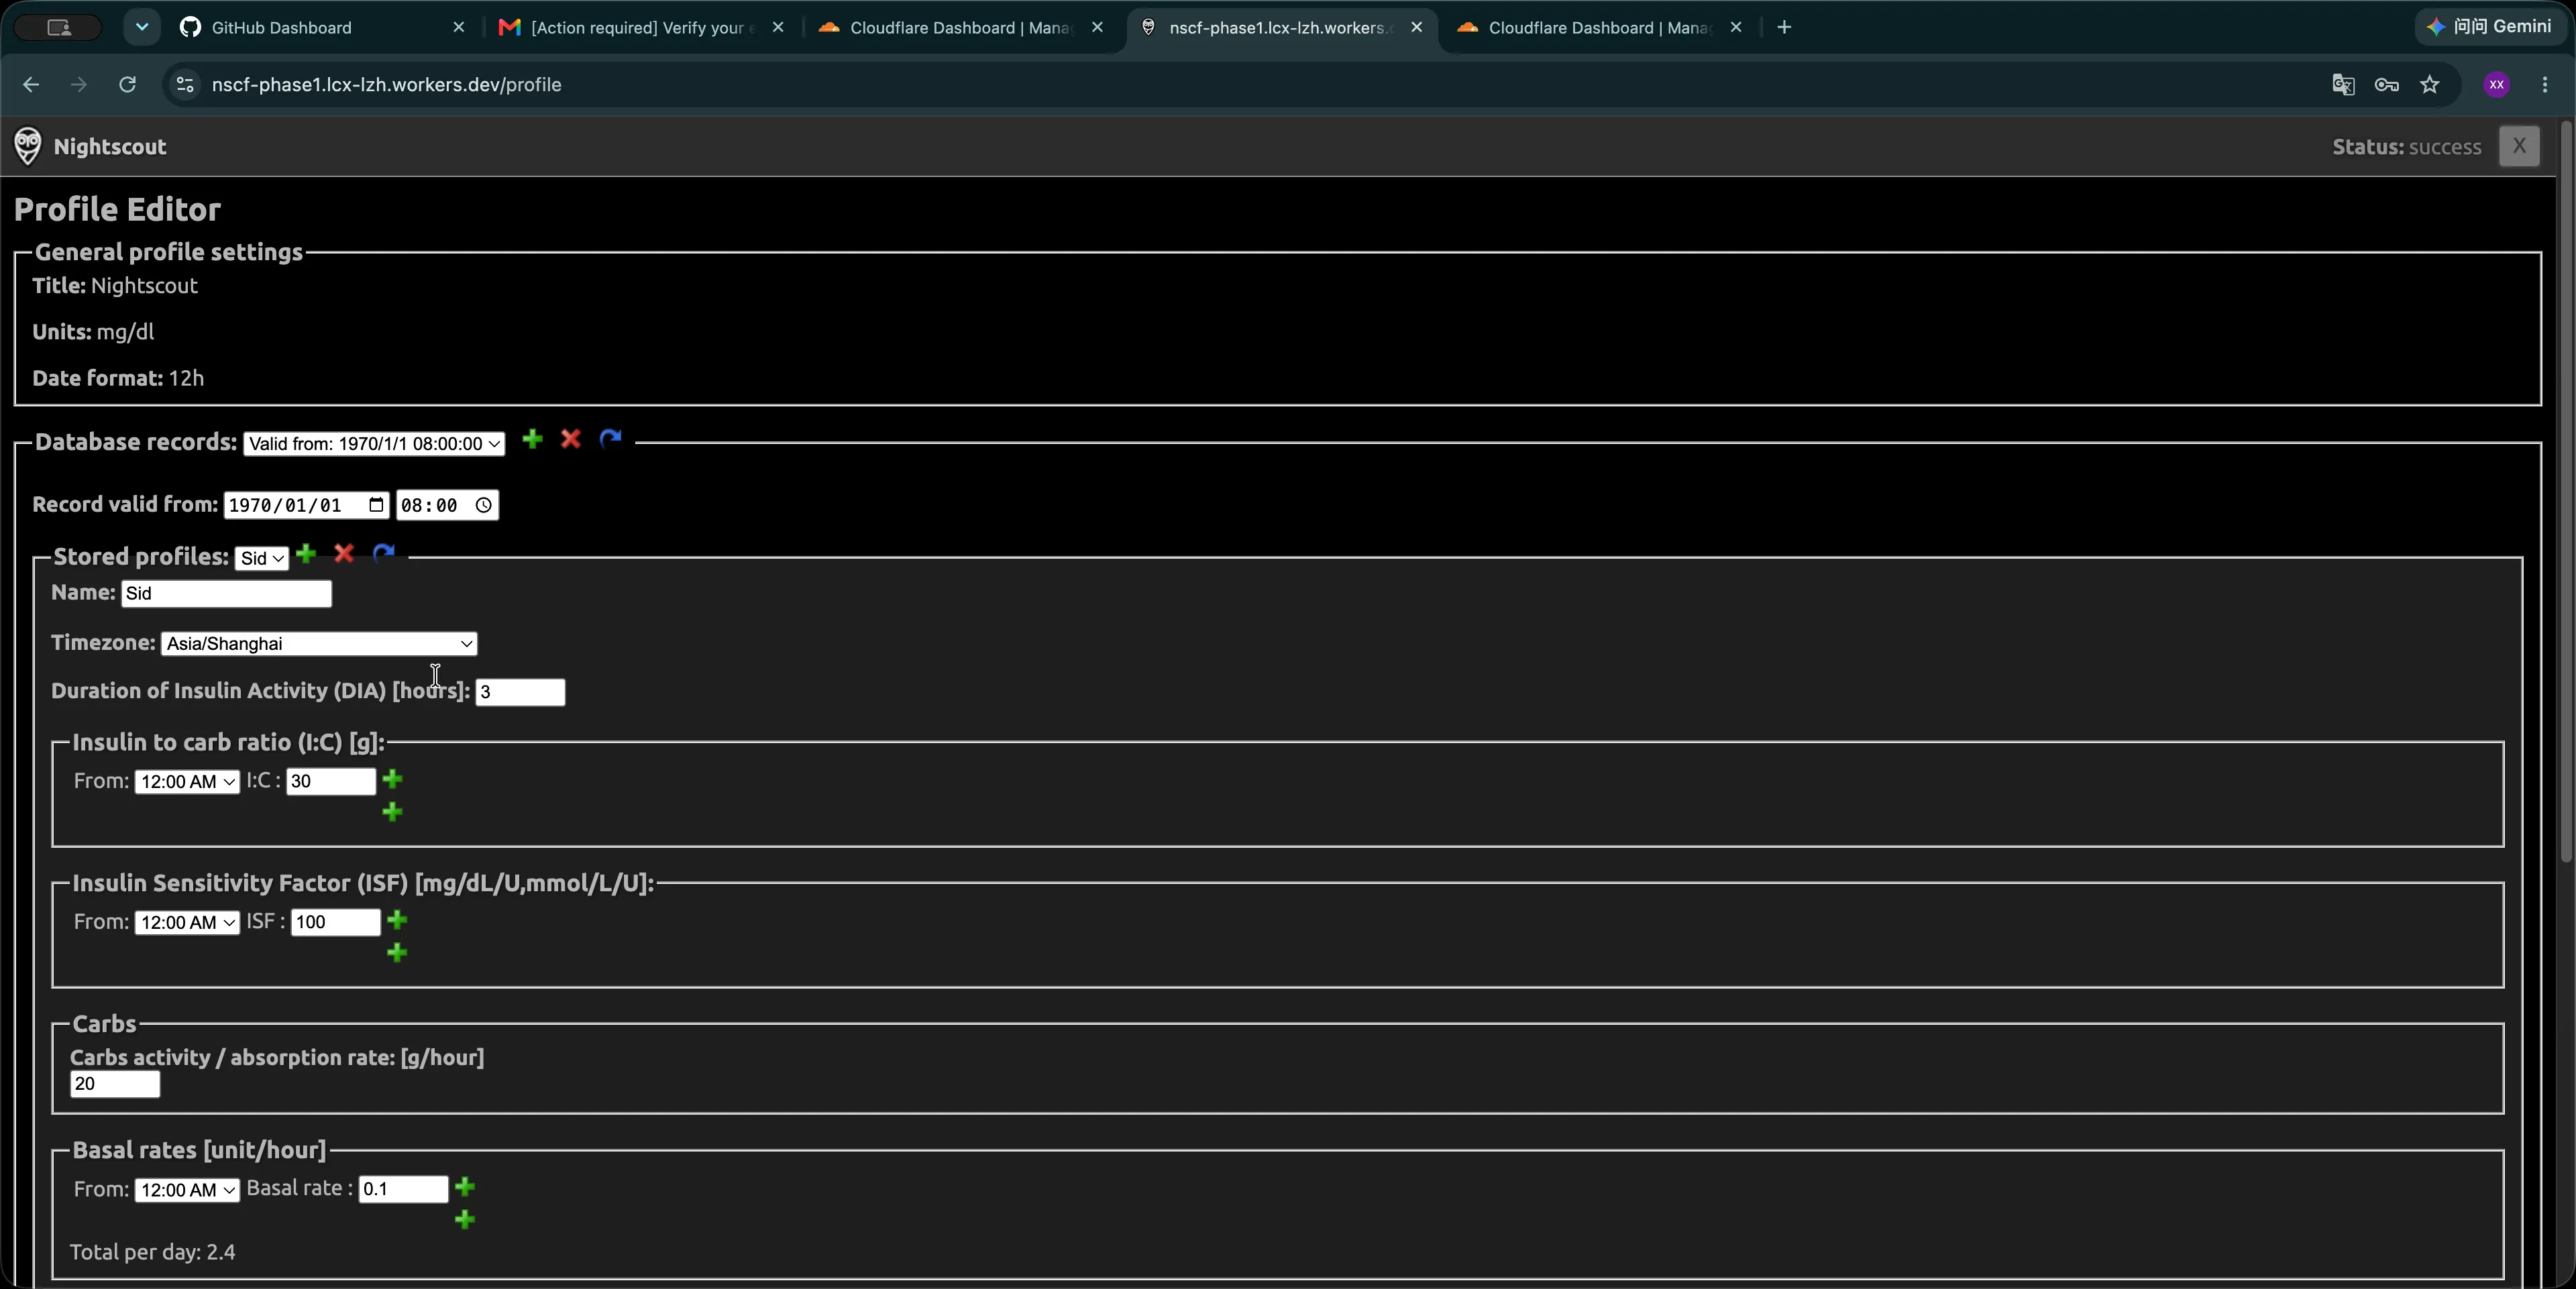
If you do not want to fill in these settings yet, you can scroll straight to the bottom, authenticate, and save.
You can also fill in anything you already know. These settings can be changed later, so it is fine to leave anything you do not understand at its default value for now.
To save:
- Scroll to the bottom of the page.
- Click Authenticate.
- Enter the
API_SECRETyou chose during deployment. - After authentication succeeds, click Save.
One thing to note: Nightscout will not send you back to the main page after saving. Click the × in the top-right corner, or enter your Nightscout address again in the browser.
Step 11: Connect your glucose device
Finally, connect your device or uploader to the Nightscout you just deployed.
The setup is different for each device and uploader. Open the official Nightscout guide to supported uploaders and devices, find the device or app you use, and follow its setup instructions.
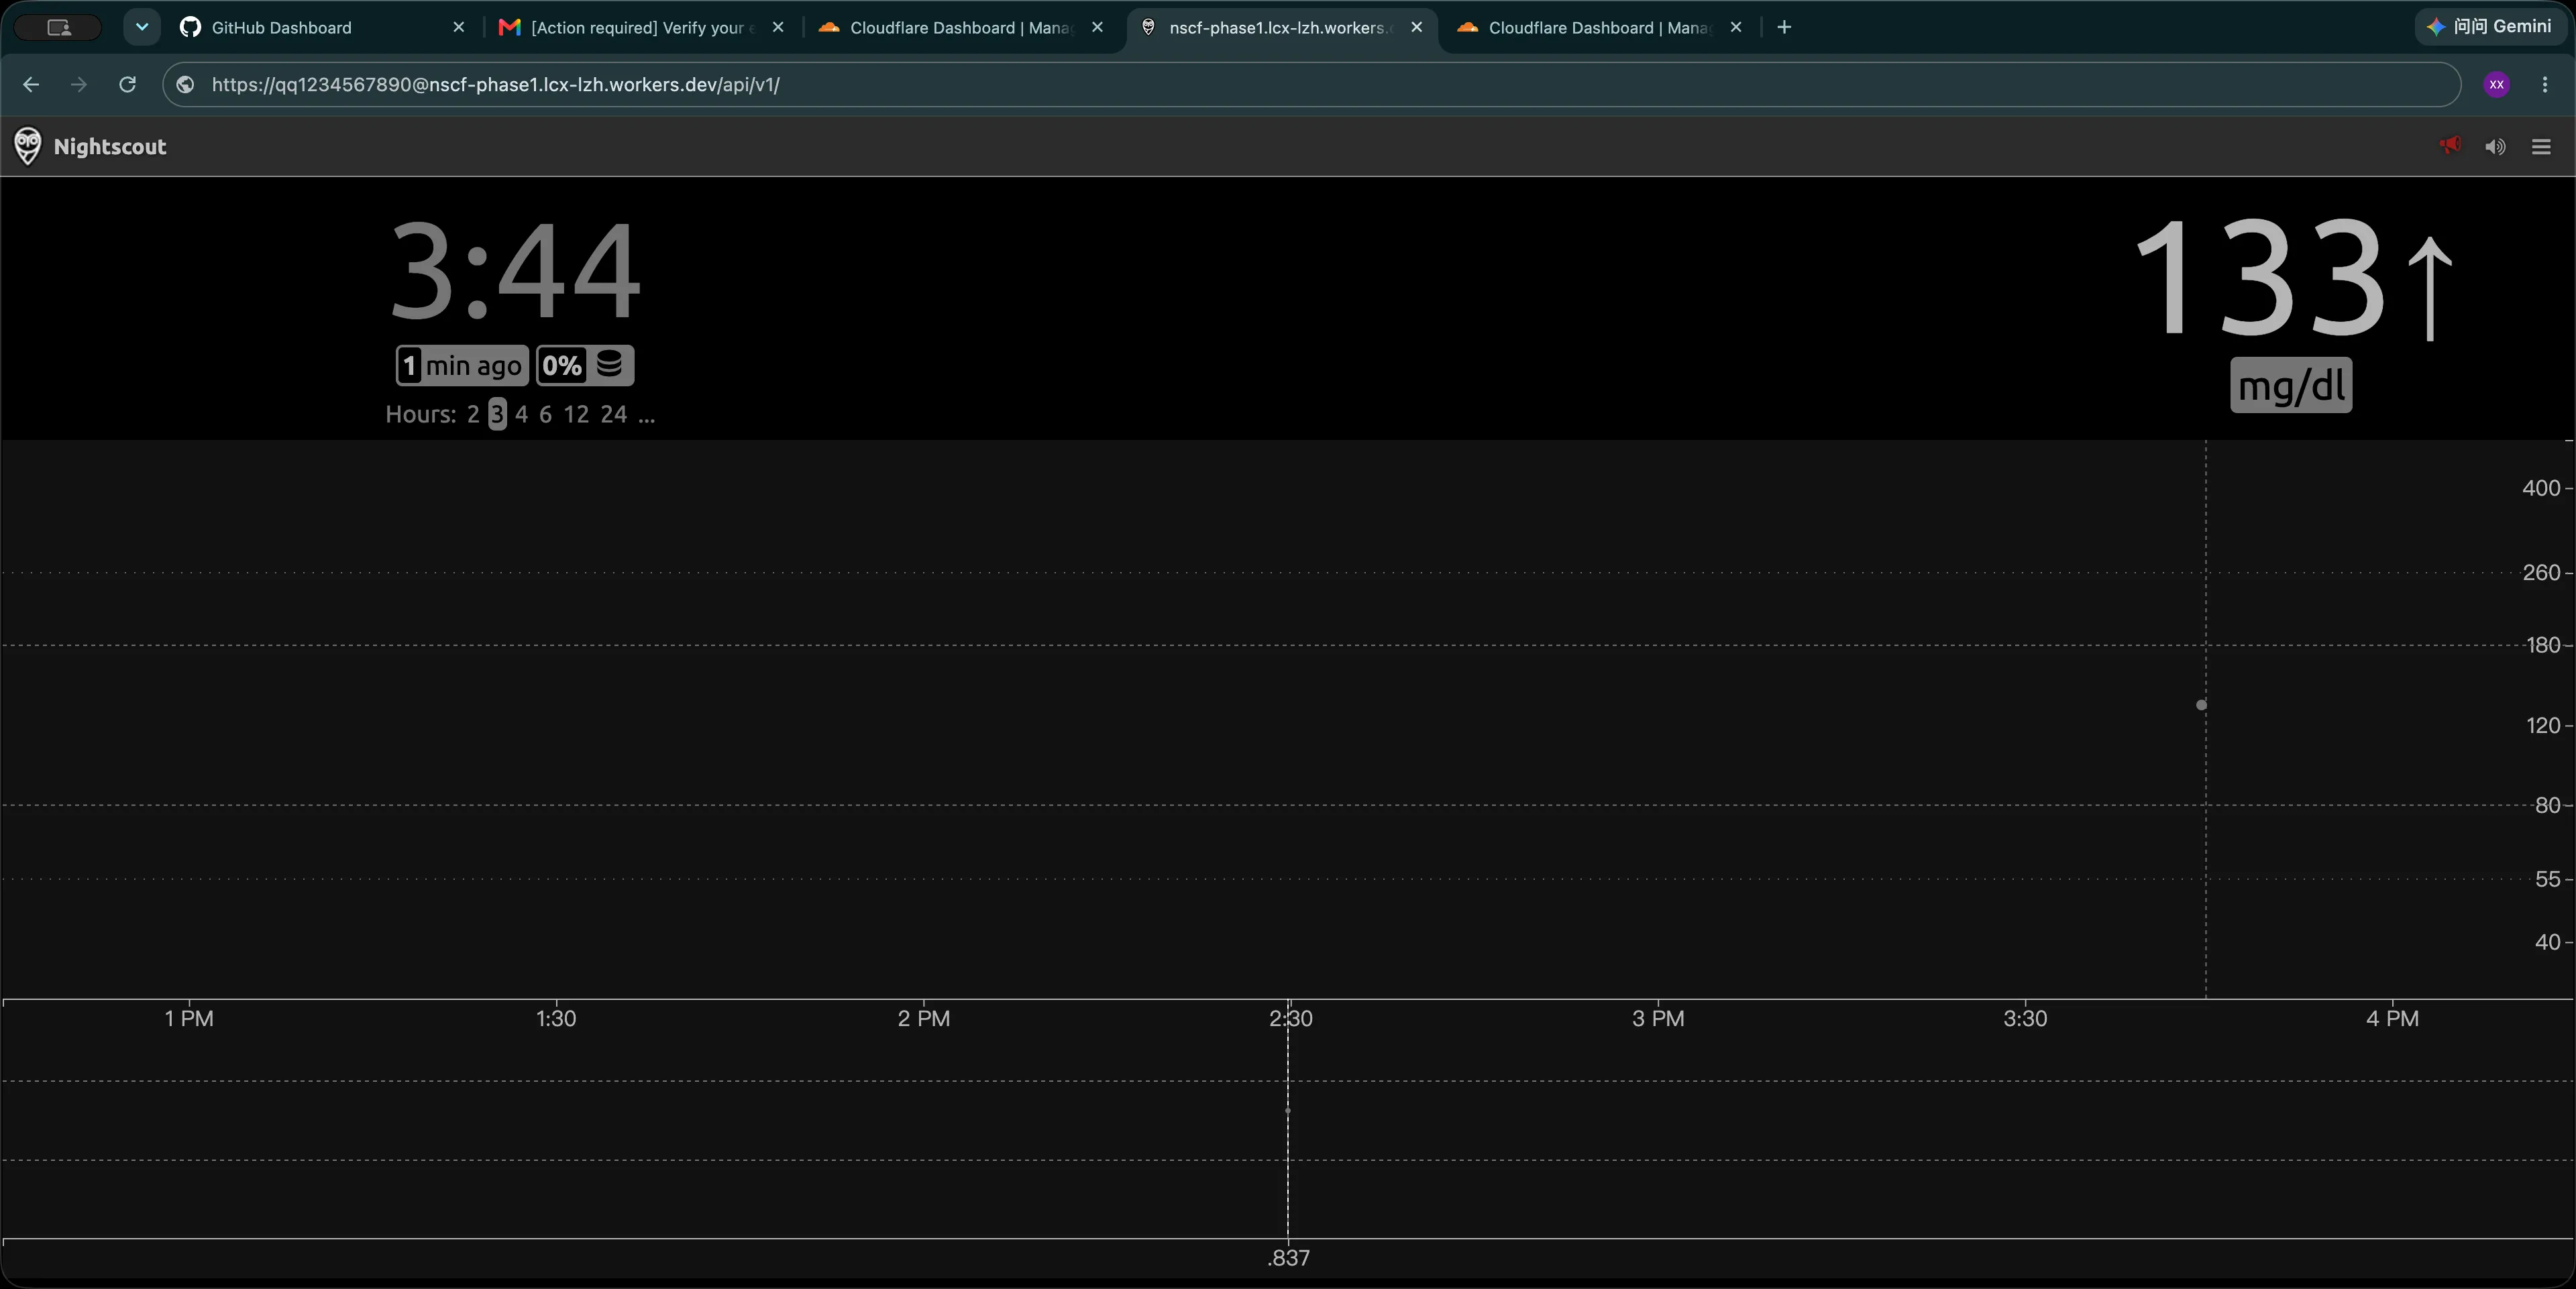
Once your device is connected and starts uploading, your first glucose reading and trend arrow will appear on the Nightscout home page.
Your Nightscout for Cloudflare deployment and basic setup are now complete.
What you can do next
Once the basic setup is working, you can also configure:
- More Nightscout features with environment variables
- A custom domain
- AAPS
- xDrip+
- Loop
- Other closed-loop systems or glucose uploaders
- Nightscout for Cloudflare updates
These can each be covered in a separate guide.